


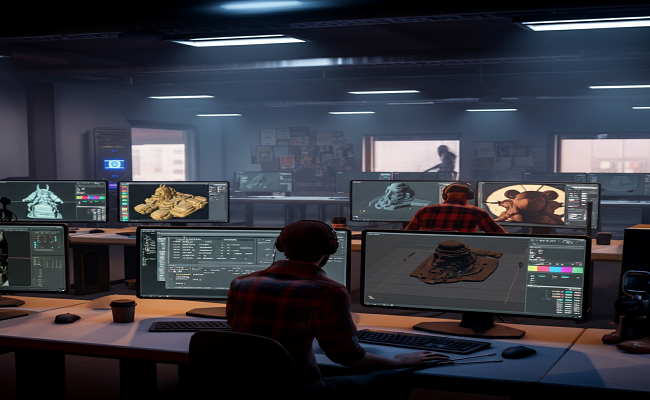
Welcome to the world of digital creation! If you’ve ever been amazed by the incredible animations and videos made using Source Filmmaker (SFM), you might have wondered about the magic happening behind the scenes. A crucial part of that magic is a process known as sfmcompile. This guide will walk you through everything you need to know about sfmcompile, from what it is to why it’s so important for animators and creators. Whether you’re a seasoned pro or just starting, understanding this core process will help you bring your creative visions to life more effectively.
Think of it like baking a cake. You have all your ingredients (models, maps, sounds), but you need to mix them together and bake them in the oven to get the final, delicious product. In the world of Source Filmmaker, sfmcompile is that final “baking” step that turns all your separate project files into a single, polished video.
Key Takeaways
- What is SFMCompile?: It’s the final rendering and exporting process in Source Filmmaker that converts your animation project into a standard video file format (like .mp4 or .mov).
- Why is it Important?: It allows you to share your animations on platforms like YouTube, social media, or with friends who don’t have SFM installed.
- Customization is Key: The sfmcompile process offers numerous settings that can dramatically affect your final video’s quality, file size, and appearance.
- Troubleshooting is Normal: Errors during the sfmcompile process are common, but most can be fixed by checking settings, file paths, and system resources.
What Exactly is SFMCompile?
At its core, sfmcompile is the command and process used within Source Filmmaker to render a project. When you work on an animation in SFM, you’re manipulating models, lights, cameras, and particle effects within a live, editable environment. This project file (.dmx) contains all the instructions for how these elements should behave. However, you can’t just upload that project file to YouTube.
This is where sfmcompile comes in. It takes all the information from your project—every camera movement, character pose, and lighting change—and processes it frame by frame. It combines the visual data with the audio tracks you’ve added to create a cohesive, playable video file. This process is also known as “exporting” or “rendering,” but within the SFM community, you’ll often hear it referred to specifically as compiling the session.
The Technical Side of the Process
Technically, when you initiate an export, SFM begins a rendering sequence. It calculates the lighting, shadows, textures, and motion blur for each individual frame of your animation based on the settings you’ve chosen. This can be a very resource-intensive task, demanding a lot from your computer’s processor (CPU) and graphics card (GPU). The complexity of your scene and the quality settings you select will directly impact how long the sfmcompile process takes. A simple, short animation might take a few minutes, while a complex, high-resolution scene could take many hours to compile.
Why is the SFMCompile Process So Crucial?
The sfmcompile process is the bridge between your creative workspace and the outside world. Without it, your amazing animation would be stuck inside Source Filmmaker, only viewable by you or someone else with the software and your project files. Compiling your work makes it accessible, shareable, and permanent.
Imagine you’re a filmmaker. You’ve shot all your scenes, but they exist as raw footage on different memory cards. The editing process is where you assemble them, but the final export is what creates the actual movie that people can watch in a theater or on their TV. The sfmcompile process serves the exact same function. It’s the final step that solidifies your work into a distributable format. This is essential for building a portfolio, sharing your creations on social media, collaborating with others, or simply showing your friends what you’ve made. It turns your project from a set of instructions into a finished piece of art.
Sharing and Archiving Your Work
Beyond just sharing, the sfmcompile process is vital for archiving. Project files can sometimes become corrupted, or future software updates might create compatibility issues. Having a final rendered video file ensures that you have a permanent copy of your finished work. This compiled video is a standalone piece of media, independent of the software that created it. This is a standard practice in digital content creation, and for trends in tech and software, you can often find insightful articles at platforms like siliconvalleytime.co.uk.
Getting Started: How to Initiate an SFMCompile
Starting the sfmcompile process in Source Filmmaker is straightforward. Once you’ve finished your animation and are ready to export, you’ll follow a few simple steps.
- Select Your Timeline: Make sure the portion of the timeline you want to export is selected. You can drag the ends of the selection tool to cover your entire animation.
- Go to the File Menu: In the top-left corner of the screen, click on “File.”
- Choose “Export”: From the dropdown menu, hover over “Export” and then select “Movie…”
- Configure Your Settings: This will open the render settings window, where the magic really happens. Here, you’ll choose your resolution, frame rate, and other quality options before starting the compile.
This initiates the sfmcompile sequence. A progress window will appear, showing you the status of the render, which frame it’s currently working on, and an estimated time to completion. It’s important not to use your computer for other intensive tasks during this process, as it could slow down the render or cause it to fail.
Understanding the SFMCompile Settings
The export settings window is your control panel for the final output. Understanding what each option does is key to getting the result you want. Let’s break down the most important settings.
Export Options Tab
This is where you set the fundamental parameters of your video.
|
Setting |
Description |
Common Choices |
|---|---|---|
|
Export |
Choose what to export. |
|
|
Resolution |
The dimensions of your video. |
|
|
Duration |
How much of the timeline to export. |
|
|
Frame Rate |
Frames per second (fps). |
|
Render Settings Tab
Here, you control the visual quality of the render. These settings have a big impact on both the look of your video and the time it takes to sfmcompile.
- Depth of Field: This setting controls the blur effect on objects that are not in focus. Higher settings create a more professional, cinematic look but will significantly increase render time.
- Motion Blur: This adds a blur effect to fast-moving objects, making the animation appear smoother and more natural. Like Depth of Field, higher quality settings will increase the time it takes to sfmcompile.
H4: Sub-Pixel Jitter AA (Anti-Aliasing)
Anti-aliasing is a technique used to smooth out the jagged edges (“jaggies”) that can appear on diagonal lines and curved surfaces in digital graphics. The “Sub-Pixel Jitter AA” option in SFM is a high-quality anti-aliasing method. By enabling this, SFM renders the scene multiple times with tiny, sub-pixel shifts and then blends them. This results in a much cleaner, smoother final image, but it comes at the cost of a much longer sfmcompile time. For final, high-quality renders, it’s often worth the wait.
Common SFMCompile Errors and How to Fix Them
It’s not uncommon to run into errors during the sfmcompile process. Don’t worry—most are fixable. Here are some of the most frequent issues and their solutions.
“Engine Error: Out of Memory”
This is perhaps the most common error, especially with complex scenes or high-resolution exports. It means SFM has used all the available system memory (RAM) and cannot continue.
- Solution: Try closing all other applications before starting the sfmcompile. If that doesn’t work, you may need to lower your render settings. Exporting as an “Image Sequence” instead of a movie can also help, as it renders one frame at a time without holding the entire video in memory.
The Compile Freezes or Crashes
If the sfmcompile process stops responding or the program closes unexpectedly, it can be due to several factors. It could be an “out of memory” issue, a problem with a specific model or particle effect, or a driver issue.
- Solution: First, try rebooting your computer and running the compile again. If it freezes at the same frame, there might be an issue with an asset in that part of your animation. Try disabling effects or models around that timestamp to identify the culprit. Also, ensure your graphics card drivers are up to date.
Tips for a Faster and Better SFMCompile
Optimizing your workflow can save you hours of rendering time and result in a higher-quality final product.
Tip 1: Render in Passes
Instead of enabling all the high-quality settings at once, consider rendering in passes. For example, you can do a base render with just the animation, and then render separate passes for ambient occlusion or special lighting effects. These can then be combined in a video editing program like Adobe After Effects or DaVinci Resolve. This gives you more control and can be more memory-efficient.
Tip 2: Use an Image Sequence
As mentioned earlier, exporting your animation as an Image Sequence (e.g., .png or .tga files) instead of a direct-to-movie file is a pro-level technique. This sfmcompile method exports each frame as a separate image.
Benefits of using an Image Sequence:
- Crash Recovery: If the render fails, you don’t lose everything. You can simply restart the compile from the last successfully rendered frame.
- Higher Quality: Image sequences are uncompressed, preserving the maximum possible quality for each frame.
- Flexibility: You can take the image sequence into other software to encode it into any video format you desire, giving you full control over the final compression.
After the sequence is rendered, you can use SFM’s built-in tools or free software like FFmpeg to compile the images and your audio file into a final video.
Advanced SFMCompile Techniques
For those looking to push their projects further, there are advanced sfmcompile methods you can explore. These often involve using console commands or external scripts to unlock more power from the Source engine.
For instance, you can use console commands to force higher-than-menu settings for things like shadow quality or ambient occlusion. This requires some research and caution, as incorrect commands can cause instability. Communities on Reddit and Discord are great places to learn about these advanced techniques from experienced users. Delving into these areas can elevate your work from good to truly professional, much like how top developers featured in siliconvalleytime.co.uk push the boundaries of technology.
Conclusion
The sfmcompile process is more than just a button you click; it’s the final, vital step in the animation pipeline that transforms your creative effort into a shareable reality. While it can sometimes be a source of frustration with its long render times and potential errors, understanding how it works is fundamental to mastering Source Filmmaker.
By learning to manage your render settings, troubleshoot common problems, and use smart techniques like exporting to an image sequence, you gain greater control over your final output. You can balance quality with speed, ensuring your projects look their best without waiting forever. So next time you’re ready to export, approach the sfmcompile settings with confidence, knowing you have the knowledge to create the best possible version of your animation.
Frequently Asked Questions (FAQ)
Q1: How long should an sfmcompile take?
A: There’s no single answer. It depends entirely on your project’s complexity, length, resolution, render settings (like Depth of Field and Motion Blur), and your computer’s hardware. A short, simple 720p animation might take 10 minutes, while a long, complex 4K animation could take over 24 hours.
Q2: Can I pause an sfmcompile?
A: No, you cannot pause the sfmcompile process when exporting directly to a movie file. If you cancel it, you will have to start over. This is a major reason why exporting to an Image Sequence is recommended for long projects, as you can effectively “pause” by stopping the render and restarting it from the last completed frame.
Q3: What is the best format to export my video in?
A: When exporting directly from SFM, you’ll typically get an .mp4 or .avi file. For the best quality and flexibility, the recommended workflow is to export as an Image Sequence (.tga or .png) and then use a separate video encoding program to create a high-quality .mp4 file with an h.264 codec, which is the standard for web platforms like YouTube.
Q4: Why does my final video look blurry or pixelated after the sfmcompile?
A: This is usually due to either low render settings or high compression. Make sure your resolution is set to at least 1080p and that your anti-aliasing and other quality settings are reasonably high. If you exported directly to a movie, SFM might have used a high level of compression. Using an image sequence gives you more control over the final video compression to avoid this.
Q5: Does my GPU or CPU matter more for sfmcompile?
A: Both are important, but they handle different things. Generally, the rendering process in SFM is more CPU-intensive, as it calculates lighting, physics, and object data. However, a good GPU is still necessary for handling the textures, models, and visual effects on screen. For the final sfmcompile process, a strong CPU will often have the biggest impact on reducing render times.


