


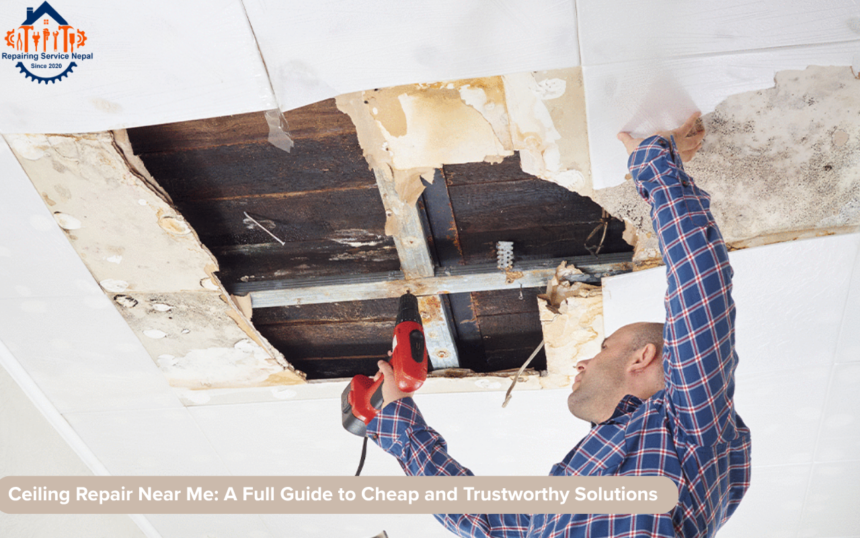
Looking up and seeing a nasty brown water stain, a spiderweb of cracks, or sagging plaster can instantly ruin the vibe of a room. It’s stressful, unsightly, and sometimes a sign of a bigger problem. You just want it fixed, and fast. That’s usually the moment you grab your phone and type “ceiling repair near me” into the search bar, hoping for a miracle worker.
Whether you are dealing with the aftermath of a leaky roof, accidental damage from moving furniture, or just the wear and tear of an older home, ceiling issues need attention. Ignoring them often leads to bigger headaches down the road. This guide is here to walk you through everything you need to know about ceiling repairs, from DIY fixes to hiring the right professional.
Key Takeaways
- Identify the Cause: Always find the source of the damage (like a leak) before repairing the cosmetic issue.
- Know When to DIY: Minor cracks are easy fixes; structural sagging requires a pro.
- Cost Factors: Prices vary based on material (drywall vs. plaster) and the extent of the damage.
- Hiring Help: Searching for “ceiling repair near me” requires vetting contractors for insurance and experience.
Why Is My Ceiling Damaged? Common Causes You Should Know
Before you can fix a problem, you have to understand what caused it. Ceilings don’t just crack or stain for no reason. Usually, there is an underlying issue that needs to be addressed first. If you skip this step, you will likely be repairing the same spot again in a few months.
Water Leaks and Moisture Issues
Water is the number one enemy of ceilings. If you have a bathroom above your living room, a leaky pipe could be the culprit. Roof leaks are another major cause, especially after heavy storms. You will usually identify this by a yellow or brown ring on the drywall or plaster. It might feel damp to the touch. Before you search for “ceiling repair near me,” you absolutely must call a plumber or roofer to stop the water. Fixing the drywall while the pipe is still leaking is a waste of money.
Structural Settling and Age
Houses move. It’s a natural part of a home’s life cycle. As the foundation settles into the ground, the frame of the house shifts slightly. This movement can pull ceiling joists apart or push them together, resulting in cracks. These stress cracks often appear near corners or where the wall meets the ceiling. While minor settling is normal, large, jagged cracks could indicate a foundation issue that needs a structural engineer.
Poor Installation
Sometimes, the original work just wasn’t up to par. If the drywall wasn’t fastened correctly to the joists, it can start to pull away over time. This is often called “nail popping,” where you see little circles protruding from the ceiling surface. In other cases, if the drywall tape wasn’t bedded properly in the joint compound, it can peel and crack.
Types of Ceiling Damage and How to Spot Them
Not all ceiling damage looks the same. Identifying the specific type of damage helps you describe the problem accurately when you call a professional. It also helps you decide if this is a weekend DIY project or a major renovation.
1. Hairline Cracks
These are thin cracks that look like a strand of hair. They are very common in plaster ceilings but can happen in drywall too. They are usually cosmetic and caused by temperature changes or humidity.
2. Peeling Paint or Plaster
If your paint is flaking off in sheets, it’s often a sign of high humidity or moisture getting behind the paint layer. This is common in bathrooms that aren’t ventilated well.
3. Sagging Ceilings
This is a serious “red flag.” A sagging or bowed ceiling often means the drywall has detached from the joists, or there is heavy water pooling on top of it. This requires immediate attention because a section of the ceiling could collapse.
4. Discolored Stains
As mentioned earlier, yellow, brown, or copper-colored stains are the signature of water damage. Even after the spot dries, the stain remains and is difficult to cover with standard paint.
DIY vs. Professional Repair: Making the Right Choice
It is tempting to try and save money by doing things yourself. We all love a good weekend project. However, ceiling work is physically demanding. You are working overhead, constantly looking up, and standing on ladders. It’s hard on your neck, back, and shoulders.
When to DIY:
- Small holes: Nail holes or damage smaller than a few inches.
- Hairline cracks: Easy to patch with a little spackle and paint.
- Peeling paint: Scraping and repainting is manageable for most homeowners.
When to Hire a Pro:
- Water damage: Ensuring mold isn’t present requires expertise.
- Sagging ceilings: This is dangerous and requires heavy lifting.
- Textured ceilings: Matching popcorn or knockdown texture is an art form that is very hard to get right.
- Large holes: Replacing full sheets of drywall is a two-person job requiring specific tools.
If you decide the job is too big, typing “ceiling repair near me” into your browser is the first step toward getting professional help.
How to Find the Best Ceiling Repair Near Me
Searching for a contractor can feel overwhelming. You want someone reliable, affordable, and skilled. Here is how to navigate the search results effectively when you look for “ceiling repair near me.”
Check Reviews and Ratings
Don’t just look at the star rating; read the actual reviews. Look for comments about cleanliness. Ceiling repair is messy—there is dust everywhere. A good contractor will cover your furniture and floors and clean up after themselves. If reviews mention they left a mess, keep looking.
Verify License and Insurance
Never hire a contractor who isn’t insured. If they fall off a ladder in your living room and get hurt, you could be liable if they don’t have workers’ compensation insurance. Ask to see proof of liability insurance and their contractor’s license before they start any work.
Get Multiple Quotes
Prices can vary wildly. It is smart to get at least three quotes for the same job. This gives you a baseline for what the repair should cost. If one quote is significantly lower than the others, be suspicious—they might be cutting corners or using subpar materials.
The Step-by-Step Process of Drywall Ceiling Repair
If you are curious about what the pros will do, or if you are brave enough to try it yourself, here is a general overview of the repair process for a standard drywall ceiling.
Step 1: Preparation and Safety
First, clear the room. Move furniture out or cover it completely with plastic sheeting. Lay down drop cloths to protect the flooring. Wear safety goggles and a dust mask because drywall dust gets everywhere.
Step 2: Cutting Out the Damage
You can’t just patch over a bad area; you have to remove it. Using a drywall saw, cut a square or rectangle around the damaged section. It is easier to patch a square hole than an irregular jagged one. Make sure you check for wires or pipes behind the ceiling before you cut.
Step 3: Installing Support
To hold the new piece of drywall, you need something to screw it into. If your hole isn’t over a joist, you’ll need to install a “backer board.” This is a piece of wood placed inside the ceiling cavity, spanning the hole, screwed into the existing drywall.
Step 4: Placing the Patch
Cut a new piece of drywall to fit the hole exactly. Screw it into the backer board or joists. The fit should be snug, but not so tight that it crumbles the edges.
Step 5: Taping and Mudding
This is the tricky part. Apply joint compound (mud) over the seams. Press paper tape into the wet mud. Smooth it out with a drywall knife. Let it dry, sand it, and apply a second (and maybe third) coat, “feathering” the edges out so the patch blends seamlessly with the rest of the ceiling.
Dealing with Popcorn Ceilings: A Sticky Situation
Popcorn ceilings (also called acoustic ceilings) were huge in the 70s and 80s, but today they are often considered outdated. Repairing them is notoriously difficult because matching the texture is nearly impossible.
The Asbestos Warning
Before you touch a popcorn ceiling in a home built before 1980, you must test it for asbestos. Asbestos fibers are dangerous if inhaled. If your ceiling contains asbestos, do not scrape or cut it yourself. You need a certified abatement specialist. When searching for “ceiling repair near me,” look specifically for hazardous material handling if your home is older.
Patching Popcorn Texture
If it is safe to work on, you can buy spray cans of popcorn texture at hardware stores. However, getting the spray pattern to match the existing ceiling takes practice. Often, the new texture looks brighter and cleaner than the old, yellowed ceiling, making the patch stand out. Many homeowners choose to scrape the entire ceiling smooth rather than trying to patch it.
Water Damage Repair: What You Need to Know
Water damage is more than just a stain; it weakens the gypsum in the drywall. If the drywall is soft or spongy, it has lost its structural integrity and must be replaced.
Mold Prevention is Key
Moisture leads to mold, often within 24 to 48 hours. If you are repairing a water-damaged ceiling, you must ensure the area is completely dry before closing it back up. Professionals will use industrial fans and dehumidifiers. They may also treat the framing with antimicrobial solutions to prevent mold growth.
Stain Blocking Primers
Even if the drywall is solid, water stains will bleed through regular paint. You must use a specialized stain-blocking primer (usually oil-based or shellac-based) to cover the water mark before applying your finish coat of ceiling paint.
How Much Does Ceiling Repair Cost?
Cost is a huge factor for everyone. While prices vary by region, here is a rough breakdown of what you might expect when you look for “ceiling repair near me.”
|
Type of Repair |
Estimated Cost |
Notes |
|---|---|---|
|
Small Drywall Patch |
$150 – $350 |
Includes labor and materials for small holes/cracks. |
|
Water Damage Repair |
$400 – $1,200 |
Depends on size; does not include fixing the leak source. |
|
Popcorn Ceiling Removal |
$1,500 – $3,000 |
Price is per room; higher if asbestos is present. |
|
Sagging Ceiling Fix |
$500 – $2,000 |
Requires re-securing joists or replacing sections. |
Note: These are estimates. Always get a written quote from your local contractor.
Plaster Ceiling Repair: A Lost Art
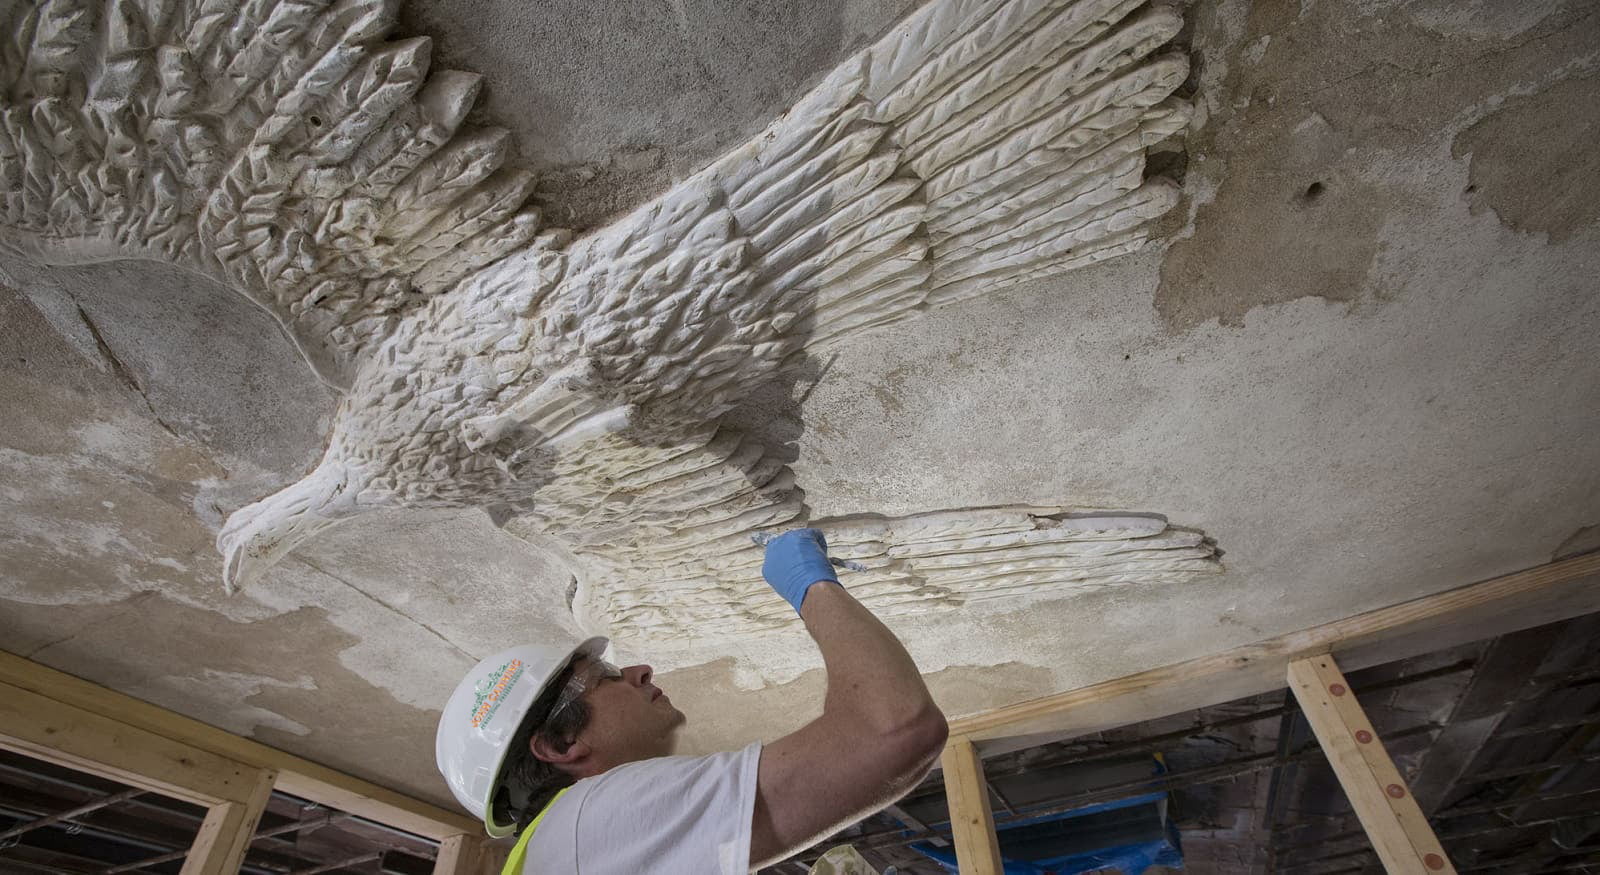
If you own a historic home, you likely have plaster and lath ceilings, not drywall. Repairing plaster is a specialized skill. Plaster is heavier and harder than drywall.
The “Keys” to Plaster
Plaster stays on the ceiling because it was pushed through wooden slats (lath), forming “keys” that harden and hold it in place. When these keys break, the plaster pulls away and sags. Reattaching plaster often involves using special plaster washers and screws to pull it back against the lath.
Finding a Plaster Expert
General handymen might not have the skills for true plaster repair. When searching “ceiling repair near me,” look for restoration specialists or contractors who specifically mention historic home renovation. Using drywall techniques on a plaster ceiling often results in cracks reappearing quickly.
Tools You Need for DIY Ceiling Repair
If you are tackling a small repair yourself, you need the right gear. Having the proper tools makes the job cleaner and the results better.
- Drywall Knife (4-inch and 10-inch): For applying and smoothing compound.
- Utility Knife: For cutting drywall and cleaning up edges.
- Sanding Sponge: Less dusty than sandpaper and conforms to shapes.
- Cordless Drill: For driving screws.
- Stud Finder: Essential for locating joists.
- Paint Roller with Extension Pole: Saves you from climbing up and down the ladder constantly.
Cleaning Up the Mess: Dust Management
One thing nobody tells you about ceiling repair is the dust. Sanding drywall compound creates a fine white powder that travels everywhere. It gets in your vents, on your curtains, and in your electronics.
To minimize this, turn off your HVAC system while sanding so the dust doesn’t get sucked into the furnace filter. Use “low-dust” joint compound if possible. Better yet, use a wet sanding sponge instead of dry sandpaper. It takes a little longer but creates zero dust. If you hire a pro via your “ceiling repair near me” search, ask them specifically about their dust containment measures.
Preventing Future Ceiling Damage
Once you have fixed your ceiling, you want to keep it that way. Prevention is always cheaper than repair.
Check Your Roof Annually
Inspect your roof for missing shingles or damaged flashing. Catching a roof issue early prevents rain from soaking your attic insulation and ruining your ceiling.
Monitor Humidity Levels
High humidity causes cracks and peeling paint. Use bathroom fans when showering and kitchen fans when boiling water. If you live in a damp climate, consider a dehumidifier.
Insulate Your Attic properly
In cold climates, “ice dams” can form on the roof, forcing water under the shingles and into your ceiling. Proper attic insulation and ventilation prevent the roof from getting warm enough to melt snow unevenly, stopping ice dams before they start.
Frequently Asked Questions (FAQ)
1. Can I paint over a water stain without repairing it?
No. You cannot just paint over it with standard latex paint; the stain will bleed through. You must use a stain-blocking primer first. If the drywall is soft, painting it won’t fix the structural damage—you need to replace the damaged section.
2. How long does a ceiling repair take?
Small patches can be done in a few hours, but because joint compound needs to dry between coats, the process often spans 2-3 days. A professional contractor might use “hot mud” (quick-setting compound) to finish smaller jobs in one day.
3. Is it safe to stay in the house during ceiling repair?
Generally, yes. However, if the repair involves mold removal or asbestos abatement, you may need to leave for a day or two. Also, if the dust is severe and you have allergies, it might be best to stay elsewhere during the sanding phase.
4. Why does my ceiling crack in the winter?
This is usually due to “truss uplift.” In winter, the bottom cord of the roof truss stays warm (buried in insulation), while the top cord gets cold. This temperature difference causes the wood to warp slightly, lifting the ceiling drywall and causing cracks at the wall joints.
5. What is the best way to find reliable “ceiling repair near me”?
Use reputable local directories, check Google Maps reviews, and ask neighbors for referrals. Local community social media groups are also great places to ask for personal recommendations for contractors who have done good work in your area.
Conclusion
Your ceiling is literally the roof over your head (well, technically the finish under the roof), and keeping it in good shape is vital for your home’s value and your peace of mind. Whether you are dealing with a minor stress crack or major water damage, addressing the issue promptly is key.
Remember, a successful repair starts with finding the root cause. Don’t just patch the symptom; fix the problem. If the job seems too dangerous or complex, don’t hesitate to search for “ceiling repair near me” and bring in a professional. They have the tools, the experience, and the insurance to get the job done right.
For more insights on home maintenance and finding the right services, you can check resources like https://siliconvalleytime.co.uk/ for additional tips. Taking care of your home is an investment that always pays off. A well-maintained ceiling not only looks better but also ensures your home remains a safe and comfortable sanctuary for you and your family. If you want to dive deeper into the technical aspects of home construction and ceilings, you can read more at Wikipedia.


