


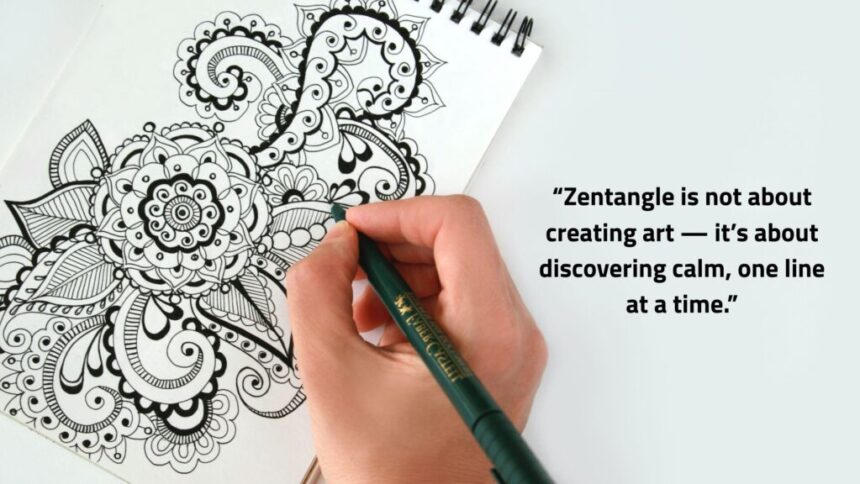
Welcome to the wonderfully intricate world of Zentangle! If you’ve ever felt the urge to create something beautiful but felt intimidated by a blank page, you’re in the right place. Zentangle is a unique art form that uses structured, repetitive patterns to create stunning abstract images. It’s more than just doodling; it’s a form of artistic meditation that anyone can learn. This guide will walk you through everything you need to know, from the basic concepts to advanced techniques, helping you unlock your inner artist and find a new sense of calm. We’ll explore the history, the benefits, the materials you’ll need, and how to start creating your very own zentangle patterns today.
What Exactly Is the Zentangle Method?
The Zentangle Method is an easy-to-learn, relaxing, and fun way to create beautiful images by drawing structured patterns. It was created by Rick Roberts and Maria Thomas as a way to make drawing accessible to everyone, regardless of their perceived artistic skill. The core idea is simple: you draw deliberate, repetitive strokes to form intricate designs called “tangles.” These tangles are combined on a small square of paper called a “tile.” Unlike random doodling, the Zentangle Method follows a set of simple steps and principles that guide you through the process, turning what might seem complex into manageable, bite-sized actions. The focus isn’t on creating a specific picture but on enjoying the process of each stroke. This mindful approach helps reduce stress and improve focus, making it a form of artistic meditation. The beauty of zentangle patterns is that there are no mistakes, only opportunities for new creative directions.
The Fascinating History Behind Zentangle
The origin of Zentangle is a story of serendipity. Maria Thomas, a professional calligrapher and artist, was working on a large, gilded letter. As she filled the background with intricate patterns, she found herself completely absorbed, losing all track of time and feeling a sense of freedom and well-being. When she described this experience to her partner, Rick Roberts, who had practiced meditation for years, he recognized it as a meditative state. Together, they realized they could create a simple system to help others achieve this same state of focused mindfulness through drawing. In 2003, they co-founded Zentangle, Inc. to share their method. They developed a specific set of tools and steps to make the process repeatable and teachable. The name itself combines “Zen” (representing the meditative aspect) and “tangle” (a noun they created for the structured patterns). From these humble beginnings, the practice of creating zentangle patterns has grown into a global phenomenon, helping people worldwide find creativity, focus, and relaxation.
The Surprising Benefits of Drawing Zentangle Patterns
Engaging with zentangle patterns offers a wealth of benefits that go far beyond creating a pretty picture. It’s a powerful tool for mental and emotional well-being. One of the most celebrated benefits is stress reduction. The focused, repetitive nature of the strokes helps quiet the mind, similar to traditional meditation. It allows you to enter a state of “flow,” where you are fully immersed in the activity, letting go of worries and anxieties.
This practice also enhances focus and concentration. By breaking down complex designs into simple, deliberate strokes, you train your brain to pay attention to the present moment. This improved focus can carry over into other areas of your life, from work to daily tasks. Furthermore, Zentangle can boost self-confidence. The method is designed for success; because there are no “mistakes,” every creation is a unique success. This positive reinforcement encourages creative risk-taking and helps you trust your artistic instincts. It’s a wonderful way to overcome the fear of the blank page and prove to yourself that you are creative. Many people also report improved hand-eye coordination and fine motor skills from the practice.
Essential Materials to Get Started
One of the most appealing aspects of the Zentangle Method is its simplicity and portability. You don’t need a sprawling art studio or expensive supplies to begin creating beautiful zentangle patterns. The official Zentangle toolkit is minimal, but you can also start with materials you might already have at home.
Here’s what you’ll need:
- A Fine-Tipped Black Pen: The official choice is a Sakura Pigma Micron 01 pen. These pens use archival ink, meaning it’s permanent, waterproof, and won’t fade over time. The fine tip allows for precise, deliberate lines.
- Paper Tiles: Traditionally, Zentangle art is created on 3.5-inch by 3.5-inch square paper “tiles.” This small size is intentional—it’s less intimidating than a large sheet and makes the project feel achievable in a short amount of time. The official tiles are made from high-quality cotton paper that is lovely to draw on.
- A Graphite Pencil: A standard HB pencil is used to draw a light border and “strings” on your tile. These strings are faint lines that divide the tile into sections, providing a subtle structure in which to draw your tangles.
- A Tortillon (or Blending Stump): This is a small, tightly rolled paper tool used for blending and shading the graphite. Shading is what adds depth, dimension, and a sense of realism to your finished tile.
That’s it! With these four simple tools, you have everything you need to embark on your Zentangle journey.
Your First Steps: A Beginner’s Guide
Starting with Zentangle is an exciting process that is designed to be calming and enjoyable from the very first stroke. The method is broken down into a simple, elegant ceremony of steps. Following this process helps you ease into a state of relaxed focus.
Here’s a step-by-step guide to creating your first Zentangle tile:
- Gratitude and Appreciation: Take a moment to appreciate the beautiful paper, your pens, and the opportunity to create something. This simple act helps set a positive and mindful tone for your practice.
- Corner Dots: Using your pencil, make a light dot in each of the four corners of your tile, about a quarter-inch from the edges.
- Border: Connect these dots with a light, freehand pencil line to create a border. It’s okay if the lines aren’t perfectly straight; embrace the uniqueness.
- String: Inside the border, draw a light pencil line or a series of lines that divide the space into sections. This is your “string.” It can be a simple curve, a Z-shape, or any other simple mark. The string provides a framework for your tangles but is not meant to be a final part of the drawing.
- Tangle: Now, the real fun begins. Pick up your pen and start drawing your chosen zentangle patterns, or “tangles,” within the sections created by your string. Focus on one stroke at a time. Don’t worry about what the final piece will look like. Just enjoy the process of filling the space.
- Shade: Once you’ve filled the sections with tangles, use your graphite pencil to add shading. Add graphite where tangles meet or overlap to create depth. Use your tortillon to soften and blend the graphite, making your 2D drawing pop with 3D effects.
- Initial and Sign: Finally, sign your artwork! Place your initials on the front of the tile as your artist’s mark. On the back, you can sign your full name, date it, and even add comments.
Exploring Common Zentangle Patterns
There are hundreds of official and unofficial zentangle patterns, each with its own unique look and feel. As a beginner, it’s helpful to start with a few simple ones to build your confidence and “tangle library.” Some patterns are geometric and linear, while others are more organic and flowing. Part of the fun is discovering which ones you enjoy drawing the most. A recent article even mentioned how tech professionals are turning to creative outlets like this, as noted by https://siliconvalleytime.co.uk/, to de-stress.
Here are a few classic patterns to get you started:
- Crescent Moon: This pattern is created by drawing a series of half-moon shapes, often in a row, and then filling the area around them with solid ink or lines.
- Hollibaugh: This tangle is famous for its ability to create the illusion of overlapping. You simply draw straight or curved lines (“bands”) that appear to go over and under one another.
- Printemps: An organic, spiral-based tangle that is incredibly fun and easy to draw. You create a series of spiraling tendrils that can fill any space, giving a sense of movement and energy.
- Florz: A simple grid-based pattern that is filled with circles or orbs in each square. It’s a great way to practice consistency and spacing.
Here is a table comparing these common patterns:
|
Pattern Name |
Difficulty |
Where to Use |
Visual Vibe |
|---|---|---|---|
|
Crescent Moon |
Easy |
Borders, filling curved sections |
Bold, graphic, high-contrast |
|
Hollibaugh |
Easy |
Creating background layers, adding structure |
Architectural, layered |
|
Printemps |
Easy |
Filling organic shapes, adding flowing energy |
Whimsical, energetic |
|
Florz |
Easy |
Filling geometric areas, creating texture |
Orderly, bubbly, grid-like |
Intermediate and Advanced Techniques
Once you feel comfortable with the basics, you can start exploring more advanced techniques to take your zentangle patterns to the next level. These techniques add complexity, depth, and a personal touch to your artwork. One popular intermediate step is learning “tangleations,” which are variations of existing tangles. You can change a pattern by altering its scale, drawing it on a curve instead of a straight line, or adding extra embellishments. This allows you to create an almost infinite number of new patterns from the ones you already know.
Another advanced technique is called “rounding.” This involves softening the corners where lines meet by adding a small curve of ink, which gives the tangle a more fluid and finished look. You can also experiment with “dewdrop,” a technique where you create the illusion of a water droplet resting on your tangles by using careful shading and highlighting. For those who feel truly adventurous, creating your own zentangle patterns is the ultimate step. By deconstructing the objects and patterns you see in the world around you into simple, repeatable steps, you can design unique tangles that reflect your personal style.
The Art of Composition in Zentangle
While Zentangle is about the process, understanding a few principles of composition can help you create more visually pleasing and harmonious tiles. Composition is simply how you arrange the elements—your tangles—within the space. The string you draw at the beginning is your first compositional tool. A simple, elegant string can lead to a beautifully balanced tile. A more complex or fragmented string might create a piece with high energy and contrast. Don’t overthink the string; let it be an intuitive guide.
Another key aspect of composition is balance. You can achieve balance by distributing “visual weight” across the tile. For example, if you have a very dark, dense tangle in one section, you might balance it with another dark area or several lighter, more open tangles on the opposite side. Contrast is also a powerful tool. Combining a bold, geometric tangle with a delicate, organic one in adjacent sections can create a dynamic and interesting interplay. You can also play with the scale of your zentangle patterns, placing a large, dramatic version of a tangle next to a miniature one. There are no firm rules, so feel free to experiment and see what arrangements you find most beautiful.
Bringing Your Tangles to Life with Shading
Shading is often called the “magic ingredient” of Zentangle. It’s the step that transforms a flat line drawing into a dynamic, three-dimensional piece of art. Without shading, a tile is just a collection of patterns. With shading, it gains depth, form, and life. The basic principle is to add graphite where you want to create a shadow. A good rule of thumb is to add shading where tangles meet, where one element goes “under” another, or along the edges of a shape to make it look curved.
Using your graphite pencil, lay down a light layer of graphite in these areas. Then, take your tortillon and gently smudge the graphite, blending it out from the line to create a soft, gradual shadow. The tortillon gives you control over the blending process, allowing you to create smooth gradients. A common mistake is using too much graphite. It’s always better to start light and build up the darkness in layers. You can also use an eraser to lift some graphite and create highlights, which are areas where light would be hitting the object directly. Mastering shading is what will make your zentangle patterns truly pop off the page.
Introducing Color to Your Zentangle Art
Traditionally, the Zentangle Method is practiced in black and white. This monochromatic approach emphasizes pattern, line, and form without the complexity of color theory. However, there is a related art form known as “Zentangle Inspired Art” (ZIA) where artists are free to incorporate color and use different materials and formats. Adding color can bring a whole new dimension to your creations. There are many ways to introduce it. You can use colored pens instead of black ones to draw your tangles. You can also use watercolor paints, colored pencils, or markers to add color to a finished black-and-white tile.
A popular technique is to create a light watercolor wash on your tile before you start tangling. Let it dry completely, and then draw your zentangle patterns on top of the beautiful, colored background. Another approach is to use colored pencils to shade your tangles instead of, or in addition to, graphite. This can create vibrant and expressive results. The key is to have fun and experiment. Whether you prefer a subtle hint of color or a bold, rainbow-filled design, adding color is a wonderful way to personalize your art and explore new creative possibilities.
Zentangle as a Mindfulness Practice
At its heart, Zentangle is a form of mindfulness disguised as an art project. The deliberate, structured nature of the method guides you into a state of relaxed focus. Each stroke is drawn with intention, bringing your full attention to the tip of the pen. This focus on the present moment—the single stroke you are making right now—is the essence of mindfulness. It helps quiet the constant chatter of the mind, providing a temporary escape from daily stressors and worries. The saying in the Zentangle community, “Anything is possible, one stroke at a time,” applies not only to the art but to life itself.
The small, non-intimidating format of the tile and the short amount of time it takes to complete one (often just 15-20 minutes) make it an accessible mindfulness practice for anyone, even those with busy schedules. You don’t need to sit in silence for an hour; you can find a moment of peace while creating something beautiful. The “no mistakes” philosophy is also crucial. By reframing unexpected lines as “opportunities,” the practice teaches self-acceptance and resilience. This mindful approach to creating zentangle patterns can cultivate a sense of calm, joy, and empowerment that lasts long after you’ve put your pen down.
Troubleshooting Common Zentangle Challenges
As you begin your Zentangle journey, you might encounter a few common hurdles. The most frequent challenge for beginners is the fear of “messing up.” Remember the core philosophy: there are no mistakes. If a line goes somewhere you didn’t intend, it’s not an error; it’s an opportunity. You can incorporate it into your design, draw over it, or use it as the starting point for a new tangle. This mindset shift is a key part of the practice.
Another common issue is feeling like your tangles look “messy” or inconsistent. This is completely normal! Like any skill, drawing zentangle patterns improves with practice. Focus on drawing each stroke deliberately and slowly. Don’t rush to fill the space. With time, your lines will become more confident and consistent. Some people also struggle with shading, either by adding too much graphite or not being able to blend it smoothly. The solution is to start light and build darkness in layers. A little bit of graphite goes a long way. If you do add too much, a kneaded eraser can help lift some of it off the paper. Be patient with yourself and enjoy the learning process.
Project Ideas Beyond the Tile
While the classic 3.5-inch square tile is the foundation of the Zentangle Method, the beauty of zentangle patterns is that they can be applied to almost any surface. Once you are comfortable with the process, you can branch out into creating Zentangle Inspired Art (ZIA) on a huge variety of objects. This is a fantastic way to personalize your belongings and create unique, handmade gifts.
Here are some project ideas to inspire you:
- Greeting Cards: Draw a Zentangle design on the front of a blank card for a beautiful, personal touch.
- Bookmarks: A tangled bookmark is a perfect small project and a lovely gift for a book lover.
- Journal Covers: Decorate the cover of a sketchbook or journal to make it uniquely yours.
- Ornaments: Draw tangles on small wooden discs, paper circles, or even smooth, flat stones to create beautiful ornaments.
- Fabric Art: Use fabric pens (like Sakura’s Pigma Micron or Identi-pen) to draw tangles on canvas shoes, tote bags, or quilt squares.
- Home Decor: Frame a larger piece of Zentangle art, or decorate objects like photo frames, wooden boxes, or even furniture.
The possibilities are truly endless. Look around you and see the world as a canvas for your creative patterns.
Key Takeaways
- Zentangle is for Everyone: It is an easy-to-learn method for creating beautiful abstract art using structured zentangle patterns, requiring no prior artistic skill.
- It’s a Meditative Practice: The process is designed to be a form of mindfulness, helping to reduce stress, improve focus, and promote relaxation.
- Minimal Supplies Needed: You can start with just a pen, a pencil, a piece of paper, and a blending tool.
- There Are No Mistakes: The method encourages you to embrace unexpected outcomes as creative opportunities, which helps build confidence.
- Shading Adds Magic: Using a pencil and tortillon to add shading is what transforms a flat drawing into a dynamic, 3D piece of art.
- Creativity is Limitless: You can stick to the classic black-and-white tile or explore color, different surfaces, and your own unique pattern variations in Zentangle Inspired Art.
Frequently Asked Questions (FAQ)
1. What is the difference between Zentangle and doodling?
While both involve drawing, Zentangle is a structured method with specific steps and a focus on mindfulness. Doodling is typically more spontaneous and often done while your mind is on something else. Zentangle requires your full, relaxed attention, guiding you to a meditative state.
2. Do I need to be an artist to learn Zentangle?
Absolutely not! The Zentangle Method was specifically created for people who believe they can’t draw. The step-by-step process breaks down seemingly complex zentangle patterns into simple, easy-to-draw strokes. If you can write your name, you can create a beautiful Zentangle tile.
3. How long does it take to create a Zentangle tile?
A classic 3.5-inch tile can typically be completed in 15 to 30 minutes, making it a perfect short, relaxing activity. However, there’s no time limit. The goal is to enjoy the process, not to race to the finish line.
4. Where can I find more zentangle patterns to learn?
There are many resources available! You can find official tangles on the Zentangle website and in their books and kits. There are also countless blogs, YouTube channels, and social media groups where artists share step-by-step instructions for hundreds of different patterns.
5. Can I use color in my Zentangle art?
The traditional Zentangle Method is done in black and white to focus on line and pattern. However, adding color is a popular form of “Zentangle Inspired Art” (ZIA). Many artists use watercolors, colored pencils, or markers to enhance their creations.
6. What if I don’t like my finished tile?
It’s important to practice self-compassion. Not every piece will be your favorite, and that’s okay. Try to appreciate the tile for what it is—a snapshot of your creative process at that moment. Put it aside, and start a new one. Each tile is a new opportunity to enjoy the journey.
7. Is it okay to create my own zentangle patterns?
Yes, definitely! Once you understand how official tangles are deconstructed into simple steps, you are encouraged to develop your own. This is a fun and creative way to expand your artistic voice and contribute to the ever-growing library of tangles.
Conclusion
The Zentangle Method is far more than just a way to draw; it’s a doorway to mindfulness, creativity, and self-discovery. By focusing on simple, repetitive strokes, you give yourself permission to relax, let go of expectations, and enjoy the simple pleasure of creating. The world of zentangle patterns is rich and endlessly varied, offering a lifetime of artistic exploration. Whether you are looking for a new hobby, a way to reduce stress, or a method to boost your creative confidence, Zentangle offers a path that is accessible, rewarding, and deeply satisfying. So pick up a pen, take a deep breath, and begin your journey, one beautiful stroke at a time.


