Key Takeaways
- Understanding Footography: It is more than just a snapshot; it is an artistic expression focusing on feet, footwear, and how they interact with the environment.
- Essential Gear: You don’t need a professional camera; smartphones can work wonders, but lighting and angles are crucial.
- Posing and Composition: Learn how the “point of view” shot and leading lines can transform a simple picture into a story.
- Editing Magic: Post-processing is key to making skin tones look natural and enhancing the mood of your photo.
- Monetization Potential: Discover how high-quality foot photography is used in marketing, fashion blogs, and stock photography.
In the vast world of photography, new niches appear all the time. One trend that has taken social media and artistic circles by surprise is footography. While it might sound unusual at first, this specific genre of photography focuses on capturing feet in various contexts—whether it’s showcasing stylish shoes, capturing a “point of view” shot from a cliff edge, or highlighting the human form in an artistic way. It is a unique way to document travels, fashion choices, and personal perspectives.
This article isn’t just about taking a quick snap of your toes in the sand. We are going to dive deep into the technical skills, the artistic vision, and the practical applications of footography. We will explore how to make these images compelling and professional. Whether you are a fashion blogger, a travel enthusiast, or just someone looking to improve your Instagram feed, understanding the principles of this niche can elevate your visual storytelling. Let’s walk through the steps of mastering this unique art form.
What Exactly is Footography?
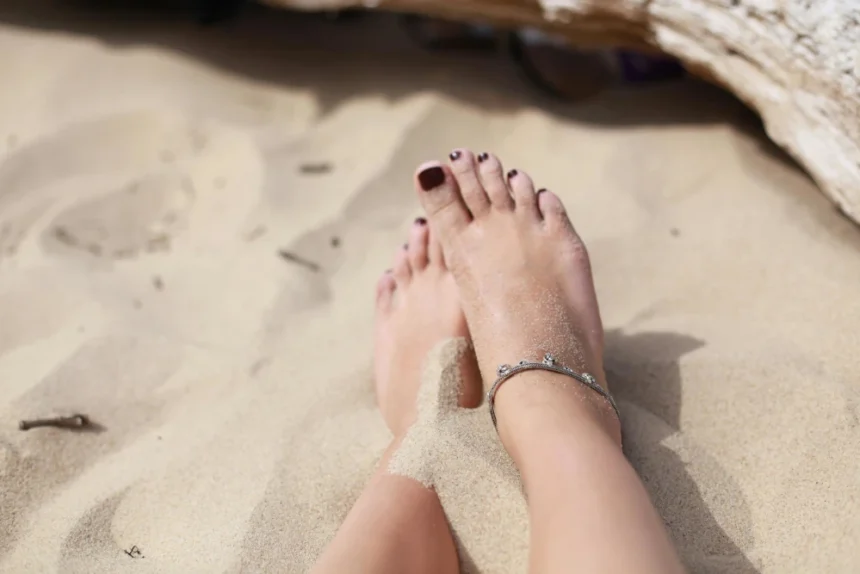
When we talk about footography, we are discussing a specialized branch of photography where the primary subject is the foot. However, it is rarely just about the foot itself. Usually, successful images in this genre use the feet as an anchor to tell a larger story. For example, a photo of hiking boots covered in mud tells a story of adventure and resilience. A photo of bare feet resting on a hammock signals relaxation and vacation vibes.
The term has gained popularity alongside social media platforms like Instagram and Pinterest. People realized that including their feet in a shot adds a personal element—it puts the viewer in the photographer’s shoes, quite literally. This technique, often called POV (Point of View), creates an immersive experience. It bridges the gap between the photographer and the audience, making the viewer feel like they are standing right there on that beach or that mountain peak. It transforms a generic landscape photo into a personal memory that others can relate to.
The Evolution of Foot Photography in Social Media
Social media has completely changed how we view photography. In the early days of Facebook, we mostly saw faces. But as platforms became more visual and aesthetic-driven, users started experimenting with different angles. The ” #fromwhereistand ” hashtag is a prime example of early footography going viral. This trend encouraged users to look down and capture their outfit and the ground beneath them. It became a staple for fashion influencers showing off sneakers and travel bloggers showing off exotic tiled floors.
Over time, this evolved into a more polished art form. Brands started noticing that photos featuring feet (often wearing their products) performed exceptionally well. It felt authentic and less “staged” than traditional studio advertising. Today, footography is a legitimate sub-genre used by major footwear brands, sock companies, and travel agencies. It has moved from blurry phone pictures to high-resolution, professionally edited content that drives engagement and sales.
Essential Gear for Stunning Foot Photos
You might be wondering if you need a $2,000 camera to get started with footography. The short answer is no, but having the right tools certainly helps. The most important piece of gear you own is likely already in your pocket: your smartphone. Modern smartphones have incredible depth-of-field capabilities (Portrait Mode) that can blur the background while keeping your feet or shoes in sharp focus. This is essential for isolating your subject from a busy floor or street.
However, if you want to take it to a professional level, a DSLR or mirrorless camera with a wide-angle lens is fantastic. A wide-angle lens (like a 24mm or 35mm) allows you to capture your feet and the beautiful scenery behind or below them. This is crucial for travel shots. Additionally, a tripod is very helpful. If you are shooting alone, a tripod with a remote shutter lets you pose your feet in the frame without having to hold the camera awkwardly at arm’s length.
|
Gear Item |
Purpose in Footography |
Recommended Level |
|---|---|---|
|
Smartphone |
Quick captures, POV shots, social media uploads |
Beginner to Pro |
|
Wide Angle Lens |
Capturing feet + landscape context |
Intermediate |
|
Tripod |
Self-portraits, low-light stability |
Intermediate |
|
Reflector |
Bouncing light onto feet to reduce shadows |
Advanced |
|
Cleaning Kit |
Ensuring shoes/feet are spotless before shooting |
Essential for All |
Lighting Techniques for Flattering Shots
Lighting is the heartbeat of photography, and footography is no exception. Bad lighting can make skin look gray, shoes look dull, and the overall image look unappealing. The best light source is almost always natural daylight. Soft, diffused light—like the kind you find on a cloudy day or during the “Golden Hour” (the hour after sunrise or before sunset)—is the most flattering. It softens shadows and gives skin a warm, healthy glow.
Avoid harsh, direct overhead sunlight (like at noon). This creates unflattering, deep shadows around the ankles and toes, and can blow out the highlights on shiny shoes. If you are shooting indoors, try to set up near a large window. Position your feet so the light hits them from the side or slightly from the front. If the shadows are too dark, use a white piece of foam board or a reflector to bounce light back onto the shadowed side. This simple trick makes a massive difference in the professional look of the image.
Working with Artificial Light
Sometimes, natural light isn’t available, or you want a specific moody vibe. In these cases, artificial lighting becomes necessary. Ring lights are popular, but they can sometimes create a flat look. A better option for footography is a softbox. A softbox diffuses the light, mimicking the softness of a window. If you are shooting product photography (like selling shoes), you might want a lightbox, which surrounds the subject with bright, even light from all sides.
When using artificial light, be very careful with the color temperature. Standard household bulbs are often very yellow (warm), while some LEDs are very blue (cool). Mixing these can confuse your camera’s white balance, resulting in skin tones that look sickly or unnatural. Always try to match your light sources or adjust your camera’s white balance settings to compensate. Consistency in lighting is what separates amateur snapshots from professional content.
Mastering Composition and Angles
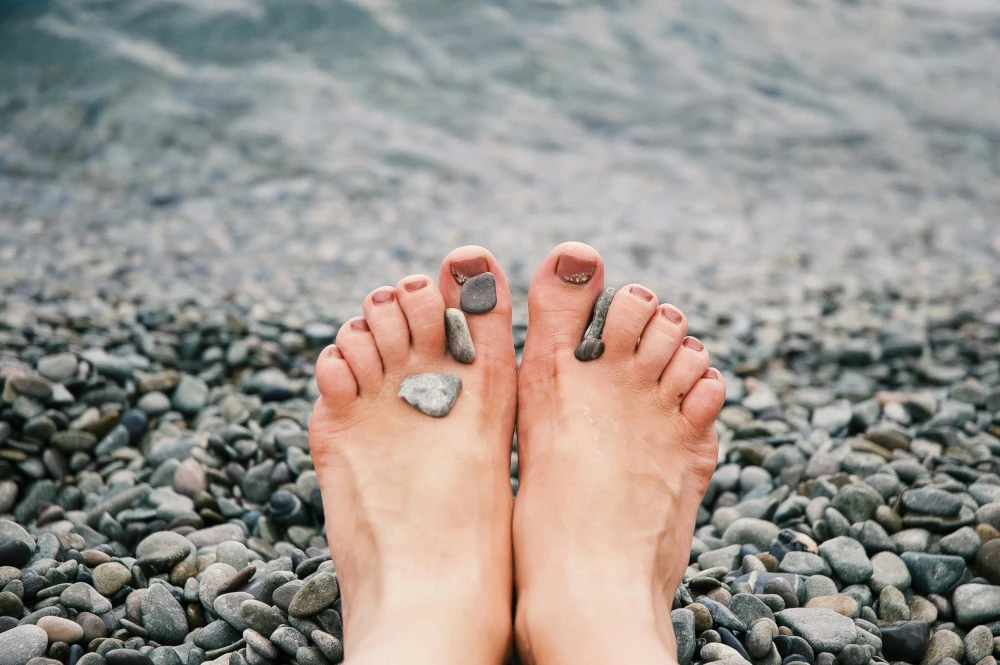
Composition is how you arrange the elements in your photo. In footography, the angle you choose changes the message of the photo entirely. The most common angle is the “Top-Down” or flat lay. This is where the camera is parallel to the ground, looking straight down at the feet. It is excellent for showcasing shoes, socks, or the texture of the ground (like sand, grass, or mosaic tiles). It is a graphic, organized way to compose an image.
Another powerful angle is the “Low Angle.” This involves placing the camera on the ground and shooting upwards or across the feet. This angle makes footwear look dominant and powerful. It is often used in sneaker photography to make the shoe look heroic. Then there is the “POV” (Point of View) shot, where you shoot from eye level looking down at your own feet stretching out into the distance. This invites the viewer into your world and is heavily used in travel blogging.
Using Leading Lines and Framing
To make your footography more dynamic, use compositional rules like leading lines. Leading lines are lines within the image that guide the viewer’s eye toward the subject. For example, if you are standing on a boardwalk, the wooden planks form lines that stretch away from the camera. If you position your feet correctly, those lines will draw the viewer’s attention right to your shoes or the landscape beyond.
Framing is another technique to consider. You can use natural elements to frame your feet. Imagine sitting under a tree and using the overhanging branches to frame the shot of your feet resting on the grass. Or, use the sides of a doorway to frame your shoes as you step out. These techniques add depth and layers to the image, making it more visually interesting than just a plain picture of a foot. It shows artistic intent and careful thought.
Posing Guide: How to Position Your Feet
Believe it or not, feet can look awkward if not posed correctly. Just standing flat-footed can look static and boring. To add life to your footography, you need to think about the shape and tension of the foot. One common trick is the “heel lift.” By slightly lifting one heel off the ground, you engage the calf muscle and create a more elegant arch in the foot. This works well for both barefoot shots and shoe shots.
Crossing the ankles is another popular pose. It implies relaxation and casual comfort. If you are sitting, try extending one leg further than the other to create diagonal lines in the frame. If you are shooting barefoot, pointing the toes (like a dancer) elongates the leg and foot, creating a more graceful line. Avoid scrunching your toes, as this can look tense. The goal is to make the pose look natural, even if it feels slightly staged while you are doing it.
The Importance of Pedicures and Foot Care
This might seem obvious, but if you are photographing bare feet, grooming is non-negotiable. High-resolution cameras capture every detail, including dry skin, unkempt nails, or lint from socks. Before a shoot, ensure that the feet are clean and moisturized. Dry, cracked heels can ruin an otherwise beautiful photo. A little bit of lotion or body oil can give the skin a healthy sheen that catches the light beautifully.
For fashion-focused footography, nail polish plays a huge role. The color of the polish should complement the surroundings or the footwear. For example, red polish pops beautifully against white sand or black sandals. Nude or clear polish gives a clean, minimalist look. If you are a male model or photographing men’s feet, neat, trimmed nails and moisturized skin are just as important. The camera is unforgiving, so preparation is key to saving time in the editing process later.
Shoe Photography: Making Footwear Shine
A massive subset of this genre is devoted entirely to footwear. Brands and influencers use footography to sell sneakers, heels, boots, and sandals. The key here is to make the product the hero. Ensure the shoes are scuff-free and clean. Even brand-new shoes can collect dust, so keep a microfiber cloth handy. When tying laces, make sure the loops are even and symmetrical. It sounds minor, but these details scream “professionalism.”
When photographing shoes, think about the lifestyle the shoe represents. If you are shooting hiking boots, don’t shoot them on a clean carpet; shoot them on gravel, dirt, or a rock. If you are shooting stilettos, shoot them on marble, a red carpet, or a sleek city street. The context helps the viewer imagine themselves wearing the shoes. Match the environment to the aesthetic of the footwear for a cohesive image.
- Sneakers: Shoot on pavement, basketball courts, or urban settings.
- Heels: Shoot on tiled floors, staircases, or in elegant interiors.
- Boots: Shoot in forests, on mountains, or in autumn leaves.
- Sandals: Shoot on beaches, near pools, or on summer grass.
Context Matters: Backgrounds and Textures
In footography, the ground is your background. Therefore, texture is your best friend. Flat, gray concrete is boring. Look for interesting surfaces that add contrast and visual interest. Cobblestone streets, colorful mosaic tiles, plush rugs, autumn leaves, ripples of sand, or wooden docks all provide fantastic textures. The contrast between the texture of the ground and the smoothness of the skin or the material of the shoe creates a pleasing visual balance.
Color theory applies here too. If you are wearing blue shoes, an orange or rusty-colored floor will make them pop because blue and orange are complementary colors. If you want a serene look, go for monochromatic colors—like white shoes on white sand. Be always on the lookout for interesting floors. There is actually a popular social media account called “I Have This Thing With Floors” that is dedicated entirely to this concept, proving how important the background is.
Travel Footography: Capturing the Journey
Travel is one of the biggest drivers of footography. It is a way to say, “I was here,” without taking a selfie. Taking a photo of your feet dangling over the Grand Canyon, or resting on a sun lounger in Bali, evokes a strong sense of wanderlust. When shooting travel content, ensure that the landmark or scenery is visible in the background or periphery.
Don’t just focus on the feet; focus on where the feet are. Use a wider aperture (lower f-stop number) to slightly blur the background while keeping the feet sharp. This keeps the focus on the personal experience while still providing context about the location. It is a subtle way to document your travels that often resonates more with audiences because it feels less vain than a standard portrait and more immersive.
Editing Your Footography for Impact
Taking the photo is only half the battle; editing brings it to life. You don’t need expensive software like Photoshop; apps like Lightroom Mobile, Snapseed, or VSCO are excellent. The first step is usually to adjust the exposure and contrast. Ensure the image is bright enough to see the details. Next, look at the “Clarity” or “Structure” tools. Boosting these slightly can bring out the texture of the shoes or the ground, but be careful not to overdo it, or skin will look leathery.
Color correction is vital. Ensure skin tones look natural—not too orange and not too blue. You can use the HSL (Hue, Saturation, Luminance) panel in Lightroom to specifically target skin colors (usually orange and yellow) to perfect them. Finally, use the cropping tool to straighten the image. Horizon lines should be level, and if you are doing a top-down shot, the lines of the floor should be straight.
Legal and Ethical Considerations
It is important to briefly touch upon privacy and consent. If you are taking photos of your own feet, you have full rights. However, if you are photographing someone else’s feet, especially in a way that identifies them, you need their permission. In street photography, taking photos of crowds is generally legal in public spaces in the US, but zooming in specifically on a stranger’s body part without their knowledge can be considered invasive and unethical.
Always be respectful. If you are doing a professional shoot, use a model release form. This document grants you the right to use the images for commercial purposes. Also, be aware of location rules. Some museums, private properties, or religious sites may prohibit photography or specifically ban tripod use. Always check the rules of the location before you set up your shot.
Monetizing Your Foot Photos
Yes, you can make money with footography. Beyond the obvious (and excluded) adult industry, there are legitimate commercial avenues. Stock photography sites like Shutterstock, Adobe Stock, and Getty Images are always looking for high-quality lifestyle images. They need generic photos of “feet on the beach” for travel brochures, or “feet in running shoes” for fitness articles.
Additionally, you can work as a content creator for brands. Shoe companies, sock brands, and even nail polish companies hire photographers to create content for their social media feeds. If you build a portfolio that showcases your ability to take high-quality, creative product shots involving feet, you can pitch your services to these businesses. It is a niche skill, but one that is in high demand for e-commerce.
Common Mistakes to Avoid
Even experienced photographers make mistakes when trying out a new genre. In footography, a common error is “limb distortion.” This happens when using a wide-angle lens too close to the subject. It can make feet look clownishly large or legs look unnaturally long. Back up a little and crop in later to avoid this.
Another mistake is neglecting the background. You might have the perfect pose and lighting, but if there is a piece of trash on the ground next to your foot, the photo is ruined. Always sweep the area with your eyes (or a literal broom) before hitting the shutter. Lastly, avoid over-filtering. Social media trends are moving toward authenticity. Heavily filtered, unrealistic photos often perform worse than clean, naturally edited images.
Building a Portfolio and Social Presence
If you want to be taken seriously as a photographer in this niche, you need a portfolio. Instagram is a great place to start, but having a dedicated website is better for professional work. Organize your portfolio by category: Lifestyle, Product, Travel, and Artistic. This shows potential clients that you are versatile.
Consistency is key on social media. Post regularly and engage with the community. Use relevant hashtags to get discovered. Don’t just use generic tags; use specific ones like #shoestagram, #travelPOV, or #sockgame. Engage with other creators in the niche. Comment on their work and build relationships. Networking can often lead to brand deals or collaborative shoots.
Conclusion
Footography is a surprisingly diverse and creative field. It challenges you to look at the world from a different perspective—literally from the ground up. Whether you are capturing the dust on your boots after a long hike, the sleek lines of a designer stiletto, or simply the feeling of sand between your toes, this genre allows for immense storytelling potential. It combines elements of landscape, fashion, and portrait photography into one unique package.
By mastering lighting, composition, and editing, you can turn simple snapshots into professional-grade images. So, the next time you are out on an adventure or trying on a new pair of shoes, look down. There might be a perfect photo waiting right at your feet. For more insights on digital trends and photography, check out resources at Silicon Valley Time.
Frequently Asked Questions (FAQ)
Q: Do I need a professional model for footography?
A: Not at all! You can easily be your own model using a tripod and a timer, or by taking POV shots holding the camera yourself.
Q: What is the best time of day to shoot outdoors?
A: The “Golden Hour” (shortly after sunrise or before sunset) provides the softest, most flattering light for skin and textures.
Q: Can I use my iPhone for professional foot photos?
A: Yes, modern iPhones and Androids have excellent cameras. Using “Portrait Mode” can help mimic the look of professional DSLR cameras.
Q: How do I edit out scratches on shoes?
A: You can use the “Healing” or “Clone Stamp” tool in apps like Lightroom, Snapseed, or Photoshop to remove small imperfections like scratches or dirt.
Q: Is footography only for selling photos?
A: No, it is widely used for art, travel blogging, fashion blogging, and personal memory keeping.
For further reading on the history and technical aspects of photography which apply to this niche, you can visit the Wikipedia page on Photography, which covers the fundamentals needed to master footography.