


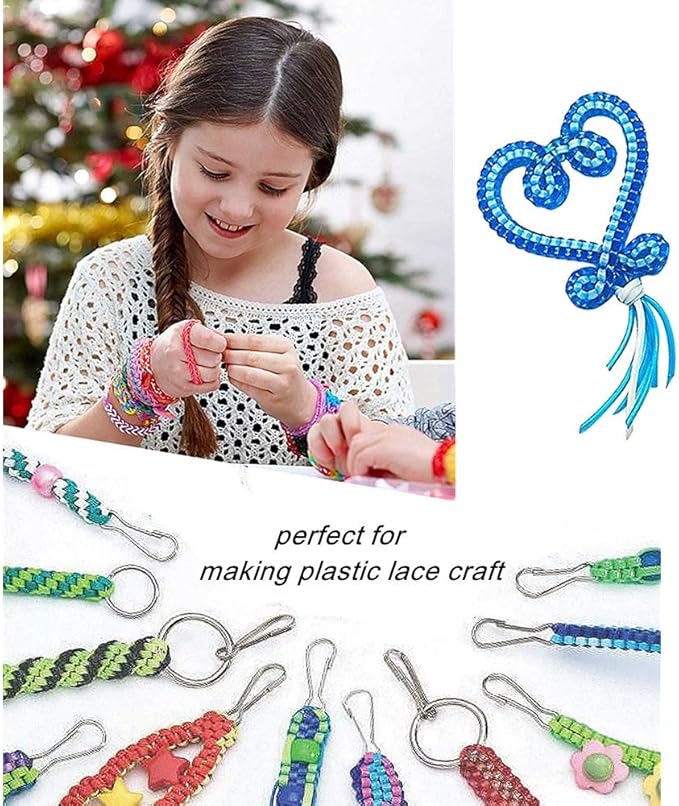
Welcome to the vibrant and creative world of scoubidous! If you’ve ever seen colorful, braided keychains, zipper pulls, or friendship bracelets made from plastic laces, you’ve likely encountered this fun and addictive craft. Scoubidous, also known as boondoggle or gimp, is a knotting craft that uses plastic lacing to create intricate patterns and designs. It’s a fantastic hobby for all ages, offering a simple way to create something beautiful and functional with just a few basic materials. Whether you’re a complete beginner or looking to expand your knotting skills, this guide will walk you through everything you need to know to get started with this delightful craft.
Key Takeaways
- What are Scoubidous?: A craft involving knotting and braiding with colorful, hollow plastic laces to create items like keychains, bracelets, and decorations.
- Simple Materials: You only need scoubidou strings and occasionally a key ring or clip to get started. No complex tools are required.
- Fundamental Knots: The square stitch (or box stitch) and the spiral stitch are the two foundational knots that form the basis for most projects.
- Endless Creativity: From simple keychains to complex animal figures, the possibilities with scoubidous are limited only by your imagination.
- Benefits: It’s a relaxing, screen-free activity that improves fine motor skills, concentration, and creativity.
What Exactly Are Scoubidous?
At its core, scoubidous is a craft that revolves around knotting thin, hollow plastic tubes or laces. These laces come in a dazzling array of colors, from bright neons to glittery and even glow-in-the-dark varieties. The name “scoubidou” originated in France and became widely popular in the late 1950s after a song of the same name. The craft itself, however, has roots in various cultures and is known by different names around the world, such as “boondoggle” in the United States and “gimp” in other English-speaking regions. The goal is to weave these strands together using specific knots to build up patterns, creating everything from simple, straight braids to more complex shapes and figures. It’s an accessible art form that doesn’t require expensive equipment, making it a favorite pastime for summer camps, school art classes, and anyone looking for a fun, hands-on project.
The History and Origin of this Fun Craft
While many associate the craft with summer camps in the 1980s and 90s, the history of scoubidous is quite interesting. The craft gained massive popularity in France in the late 1950s, largely thanks to the French singer Sacha Distel. His hit song, titled “Scoubidou,” featured a catchy chorus about a character who made things with colorful strings. This song sparked a national craze, and the craft was officially named after it. However, the practice of braiding with plastic laces existed before this, often referred to as “boondoggle” in North America. This term is believed to have originated with the Boy Scouts in the 1920s, referring to a handmade decorative leather braid worn as a neckerchief slide. As plastic became a more common and affordable material, it replaced traditional leather, leading to the colorful craft we know today.
Different Names for Scoubidous Around the World
One of the charming things about this craft is its many names, which often vary by region. Understanding these different terms can help you find more patterns and tutorials online. In the United States and Canada, you’ll most often hear it called boondoggle. In the United Kingdom and Australia, it’s frequently known as gimp, though this term can sometimes be confused with the textile trim. The name scoubidous is most prevalent in France and other parts of Europe. Other names you might encounter include plastic lacing, lanyard making, or craft lace. Regardless of what you call it, the technique remains the same: knotting and weaving plastic strands to create durable, colorful items. This global presence speaks to its universal appeal as a simple yet engaging activity.
Getting Started: The Essential Materials
One of the best things about scoubidous is how little you need to get started. There are no complicated tools or expensive machines involved. All you truly need are the strings themselves. This low barrier to entry makes it an ideal craft for kids, beginners, or anyone looking for a portable hobby.
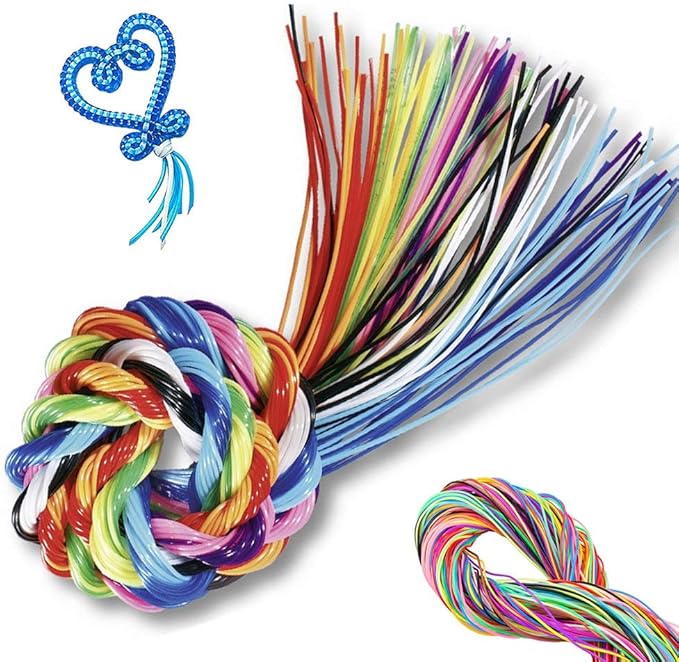
Choosing Your Scoubidou Strings
The primary material is, of course, the scoubidous string, also known as craft lace or boondoggle lacing. This is a thin, hollow, and flexible plastic cord, typically made from PVC. It comes in a vast assortment of colors, finishes, and even shapes.
Here’s a breakdown of what to look for:
- Color: You can find packs with a rainbow of colors, which is perfect for beginners. There are also neon, pastel, metallic, glitter, and glow-in-the-dark options for more unique projects.
- Shape: Most strings are flat, but you can also find round or even heart-shaped laces. The flat variety is the most common and easiest to work with for standard knots.
- Length and Quantity: Strings are usually sold in pre-cut lengths (e.g., 36 inches) or on a continuous spool that you can cut yourself. Buying a multi-color pack of pre-cut strands is often the most convenient way to start.
Essential and Optional Tools
While scoubidous can be done with just your hands, a few simple accessories can make the process easier and allow you to create more functional items.
- Scissors: A sharp pair of scissors is necessary for cutting your strings from a spool and for trimming the ends neatly when you finish a project.
- Key Rings or Lanyard Hooks: If you want to make keychains or zipper pulls, you’ll need these metal findings. You simply loop your starting knot onto the ring or hook.
- Measuring Tape: For more precise projects, a measuring tape helps ensure all your strands are the correct length. Consistent length is key to a uniform and well-balanced creation.
Mastering the Basic Knots of Scoubidous
All impressive scoubidous creations are built upon a foundation of simple, repeatable knots. Once you master the two fundamental stitches—the square stitch and the spiral stitch—you’ll be able to tackle a wide variety of projects. Patience is key when you’re first learning. Your first few attempts might look a bit wobbly, but with practice, your stitches will become tight and even.
The Square Stitch (Box Stitch)
The square stitch, also called the box stitch, is the most common and important knot in scoubidous. It creates a flat-sided, square-shaped braid. This is the knot you’ll use for most keychains, zipper pulls, and basic lanyards. It’s made using either two or four strands.
How to Do the Square Stitch (with 4 Strands)
- Start the Knot: Take two strands of different colors, find their centers, and cross them over each other to form a “+” shape.
- Loop the First Strand: Take one end of the bottom strand and loop it over the top strand, parallel to its other end.
- Loop the Second Strand: Take the corresponding end of the bottom strand and do the same on the other side. You should now have two loops.
- Weave and Tighten: Take one end of the top strand and weave it over the first loop and under the second loop. Repeat with the other end of the top strand in the opposite direction.
- Pull Tight: Carefully pull all four strands outwards simultaneously. You should see a small, tight square form. This is your first square stitch!
- Continue: Repeat this process, keeping the strands flat and pulling evenly each time, to build your braid.
The Spiral Stitch (Circle Stitch)
The spiral stitch, or circle stitch, is a simple variation of the square stitch. Instead of creating a square braid, it produces a beautiful twisting, circular pattern. It’s perfect for making decorative bracelets and dna-style keychains. The setup is identical to the square stitch, but the weaving pattern is slightly different.
How to Do the Spiral Stitch
- Set Up: Start your project just as you would for a square stitch, with two strands crossed at their center.
- Make Loops: As before, create two loops with your bottom strand by folding each end over the top strand.
- The Twist: This is where it changes. Instead of weaving over and under, take one end of your top strand and pass it under the loop next to it.
- Repeat and Pull: Do the same with the other end of the top strand, passing it under the adjacent loop.
- Tighten: Pull all four strands tight. You’ll notice the knot wants to twist slightly. As you continue adding more stitches in the same way, this twist will form a neat spiral.
The consistency of your tension is crucial for both knots. If you pull too tightly on one side, your creation will start to curve or look uneven. Aim for a firm but balanced pull on all strands.
Fun and Easy Beginner Projects
Once you’re comfortable with the basic knots, it’s time to put your new skills to the test! Starting with simple projects is a great way to build confidence. The beauty of scoubidous is that even the easiest projects result in a cool, usable item.
The Classic Keychain
A keychain is the quintessential first scoubidous project. It’s quick, easy, and lets you practice the square stitch until it becomes second nature.
Materials:
- Two scoubidou strands (about 3 feet each)
- One metal key ring
Instructions:
- Find the center of both strands and loop them through the key ring.
- Position the strands so they form a cross shape against the ring.
- Begin making square stitches, following the steps outlined earlier.
- Make sure your first stitch is pulled tight against the key ring to secure it.
- Continue making square stitches until your keychain reaches the desired length—usually about 3-4 inches.
- Finish the project by tying off the ends (more on that below).
A Colorful Friendship Bracelet
Friendship bracelets are another fantastic beginner project. For these, the spiral stitch is often a popular choice because it creates a comfortable, rounded design that sits nicely on the wrist.
Materials:
- Two scoubidou strands (cut to a length that wraps comfortably around a wrist with extra for knotting)
Instructions:
- Find the center of both strands. Instead of a key ring, create a starting loop by tying a simple overhand knot with all four strands about an inch from the center. This leaves a small loop at one end.
- Begin making spiral stitches just below this starting knot.
- Continue stitching until the braided portion is long enough to fit around your friend’s wrist.
- To finish, simply tie another overhand knot with all four loose ends. The bracelet can be secured by passing the end knot through the starting loop.
Advanced Scoubidous Techniques and Patterns
After mastering the basics, you might be eager to try something more challenging. Advanced scoubidous involves using more strands, combining different stitches, and creating three-dimensional shapes. Exploring new techniques is a great way to keep the craft exciting. For those interested in how technology intersects with traditional crafts, some creators are even using software to design complex patterns, a topic sometimes explored on sites like https://siliconvalleytime.co.uk/.
Brick Stitch and Multi-Strand Projects
The brick stitch, also known as the super-square stitch, uses eight strands instead of four. It creates a wider, flatter braid that resembles a brick wall. This stitch is perfect for making wider bracelets, belts, or even handles for small bags. The process is a scaled-up version of the square stitch, where you have two strands in each of the four directions. It requires more coordination but produces a very satisfying and sturdy result. Projects with even more strands—12, 16, or more—are possible and allow for incredibly intricate and colorful patterns.
Creating Shapes and Figures
This is where scoubidous truly becomes a form of sculpture. By strategically increasing or decreasing the number of strands and using different knotting techniques, you can create animals, cartoon characters, and other 3D objects. For example, to make a simple lizard, you might start with a square stitch for the body, then branch off with fewer strands to create the legs, and finally taper the end for the tail. This requires planning and a good understanding of how the knots behave. There are countless free patterns online for everything from geckos and dragonflies to more complex dragons and superheroes.
How to Finish Your Scoubidous Projects
A clean finish is just as important as neat stitches. An improperly finished scoubidous can unravel over time. There are two primary methods for securing the ends of your project: knotting and melting.
|
Finishing Method |
Pros |
Cons |
Best For |
|---|---|---|---|
|
Knotting |
Simple, no tools required, safe for kids |
Can be bulky, may come undone if not tight |
Bracelets, simple projects |
|
Melting |
Very secure, creates a clean, flat finish |
Requires adult supervision (use of a lighter/candle) |
Keychains, zipper pulls, items that get a lot of wear |
The Knotting Method
This is the simplest and safest way to finish a project, making it ideal for younger crafters.
- The Overhand Knot: Once you’ve completed your last stitch, take all the loose strands and tie them together in a simple, tight overhand knot. Pull it as close to the last stitch as possible.
- Double Knot: For extra security, you can tie a second overhand knot on top of the first.
- Trim: Use scissors to trim the excess strands close to the knot. You can leave a small, frayed “tassel” at the end if you like that look.
The Melting Method (Adult Supervision Required)
This method provides a more permanent and professional-looking finish. This should always be done by an adult or with close adult supervision.
- Trim the Strands: Trim the loose ends so that only about a quarter-inch remains past your last stitch.
- Melt the Ends: Briefly pass the flame of a lighter or candle over the trimmed ends. The plastic will melt almost instantly.
- Press and Fuse: Immediately (and carefully!) press the melted ends against the flat side of the lighter or another heat-resistant tool. This will fuse the strands together and to the body of the project. The melted plastic cools very quickly, creating a permanent seal. Be extremely careful not to touch the hot plastic with your fingers.
Frequently Asked Questions (FAQ)
1. How long do my scoubidou strings need to be?
A general rule of thumb is that for every inch of finished square stitch, you need about 4-5 inches of string per strand. So, for a 4-inch keychain using four strands, you would want each strand to be at least 16-20 inches long before folding it in half. It’s always better to start with strands that are too long rather than too short!
2. Why is my square stitch twisting?
If your square stitch is starting to twist into a spiral, it usually means you are accidentally making a spiral stitch. This happens when you consistently weave the strands the same way each time instead of alternating. Double-check that you are always folding your loops and weaving your working strands in the exact same pattern for each stitch. Uneven tension can also cause slight twisting.
3. Can I wash my scoubidous creations?
Yes! Since scoubidous are made of plastic, they are waterproof and very durable. You can easily clean them with soap and water if they get dirty. This makes them great for keychains, zipper pulls, and other items that see a lot of use.
4. Where can I find more patterns and ideas?
The internet is your best friend! A quick search for “scoubidou patterns,” “boondoggle animals,” or “craft lace tutorials” on websites like YouTube or Pinterest will yield thousands of free guides and video tutorials for all skill levels. There are also many craft books dedicated to the art of scoubidous.
5. Are scoubidou strings safe for kids?
The strings themselves are generally safe for children old enough to handle crafting activities without putting them in their mouths. The main safety concern is the use of scissors and, for the melting technique, a flame. Always supervise children during crafting, especially when tools are involved.
Conclusion
The art of scoubidous is more than just a nostalgic craft; it’s a timeless and accessible hobby that offers a perfect blend of simplicity and creative potential. With just a handful of colorful plastic laces, you can unlock a world of intricate knots and patterns, creating personalized items for yourself and your friends. It’s a wonderful screen-free activity that helps develop patience, concentration, and fine motor skills. Whether you stick to the classic square stitch keychain or venture into crafting complex 3D figures, the process is relaxing and the result is always rewarding. So grab some strings, find a comfortable spot, and start knotting! You might just find your new favorite pastime.


