


Welcome to the comprehensive guide on the art and science of glueing. Whether you are working on a weekend DIY craft, repairing a broken household item, or building a heavy-duty woodworking project, understanding how to bond materials effectively is a crucial skill. Many people think that sticking two things together is as simple as adding a drop of adhesive and pressing hard, but there is a lot more to it than that. Choosing the right adhesive, preparing your surfaces properly, and understanding curing times can make the difference between a project that lasts a lifetime and one that falls apart in a few days. In this detailed guide, we will explore everything you need to know to ensure your projects stick together flawlessly. We will cover the science behind adhesives, the different types of products available on the market, advanced techniques for tricky materials, and troubleshooting tips for when things do not go as planned.
Key Takeaways
- Proper surface preparation is just as important as the adhesive you choose.
- Understanding the difference between drying and curing ensures a stronger bond.
- Different materials require highly specific types of adhesives for successful glueing.
- Clamping is essential for creating a tight, gap-free bond while the adhesive sets.
- Safety and ventilation should always be a priority when working with strong chemicals.
Understanding the Basics of Glueing
When you are starting a new project, understanding the fundamental principles of glueing is your first step toward success. At its core, this process involves using a substance to bind two separate items together, resisting the forces that might try to pull them apart. It sounds incredibly simple, but the chemistry and physical mechanics at play are actually quite fascinating. Adhesion works through a combination of mechanical locking, where the adhesive seeps into microscopic pores in the materials, and chemical bonding, where molecules interact. If you skip learning the basics, you might find yourself frustrated when a seemingly straightforward repair fails unexpectedly. By taking the time to learn how different factors like temperature, humidity, and material composition affect your bond, you set yourself up for long-lasting, durable results. We will break down these concepts so that you can approach your next repair or building task with total confidence, knowing exactly why you are taking each step.
The Science Behind How Adhesives Work
To truly master glueing, you need to understand the science happening at the microscopic level. Adhesives primarily work through two main mechanisms: adhesion and cohesion. Adhesion is the force that allows the adhesive to stick to the surface of your material, often referred to as the substrate. Cohesion is the internal strength of the adhesive itself, preventing it from tearing apart under stress. When you apply a liquid adhesive, it must effectively “wet” the surface, spreading out evenly to maximize contact area. As the substance dries or cures, it changes from a liquid state to a solid state. This transformation happens either through the evaporation of a solvent (like water in standard craft adhesives), a chemical reaction triggered by mixing two parts together (like epoxy), or exposure to moisture in the air (like polyurethane). Understanding this science helps you realize why pressing two perfectly smooth surfaces together is often harder than bonding slightly roughened ones, as the rough surface provides more surface area for mechanical interlocking.
Common Types of Adhesives for Everyday Use
Choosing the correct product is arguably the most critical decision in the entire glueing process. Walking down the aisle of a hardware store can be completely overwhelming because there are hundreds of options, each promising the strongest bond. Generally, adhesives fall into a few primary categories based on their chemical makeup and intended use. You have your standard water-based options, reactive adhesives that require a chemical change, and hot melts that rely on temperature changes. Knowing which one to reach for saves you time, money, and a lot of frustration. If you use a water-based adhesive on a non-porous material like metal or plastic, it will never dry properly because the moisture has nowhere to evaporate. Conversely, using a rigid structural adhesive on a flexible fabric will result in a bond that cracks and breaks the moment the fabric bends. Let us dive deeper into the specific types you are most likely to use in your daily life.
Super Glues and Cyanoacrylates
Cyanoacrylates, universally known as super glues, are famous for their incredibly fast curing times and strong bonds. When you are glueing small, non-porous items together, this is often the go-to choice. These adhesives cure through a chemical reaction triggered by the microscopic amounts of moisture naturally present on almost all surfaces. Because they dry incredibly fast—often in mere seconds—you do not have much time to reposition your pieces once they make contact. While they offer excellent tensile strength (resisting being pulled directly apart), they are notoriously weak against shear forces (sliding actions) and impacts. They can also turn brittle over time. Therefore, they are perfect for fixing a broken ceramic mug handle or a loose piece of plastic trim, but terrible for repairing a wooden chair leg that will support human weight. Always remember to use them sparingly; a single drop is usually enough, as applying too much can actually weaken the final bond and increase curing time.
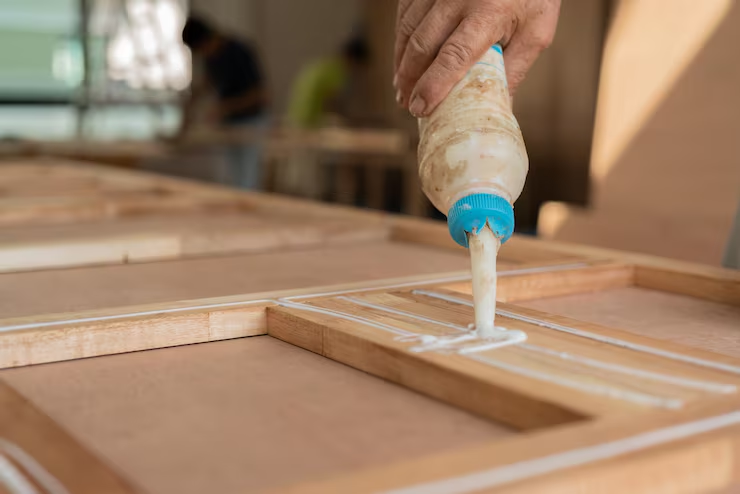
Wood Glues and Polyvinyl Acetates
Polyvinyl acetate (PVA) is the familiar yellow or white liquid that most of us grew up using in school and home projects. When it comes to glueing wood, paper, and other porous materials, PVA is an absolute champion. It works as the water in the mixture evaporates into the surrounding porous material, leaving behind a flexible, strong polymer chain that binds the pieces together. Woodworkers rely heavily on yellow aliphatic resin PVA because it creates a bond that is frequently stronger than the wood itself. It is easy to clean up with water before it dries, non-toxic, and relatively inexpensive. However, because it relies on evaporation, it is completely useless for bonding two non-porous materials like glass or metal. It also requires a substantial amount of clamping pressure to ensure the pieces remain tightly joined while the water escapes, a process that usually takes anywhere from 30 minutes to several hours depending on the specific formula and environmental conditions.
Essential Tools and Supplies for Successful Glueing
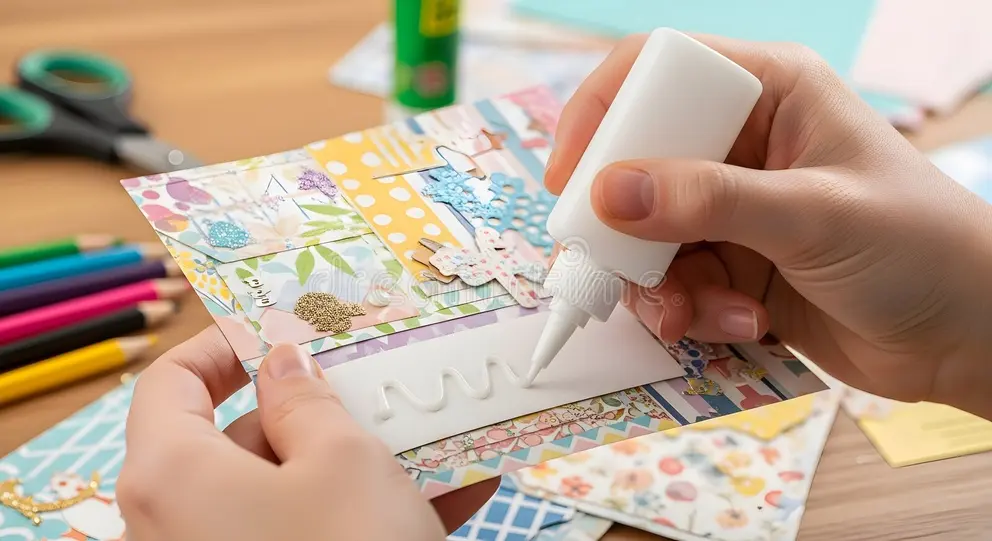
Having the right adhesive is only part of the equation; having the correct tools makes the entire glueing process smoother, cleaner, and much more effective. Professional makers and experienced DIY enthusiasts know that preparation is key. Before you even unscrew the cap of your adhesive, you should gather all your supplies. This includes applicators like brushes, spatulas, or toothpicks for precision work. You will also need a variety of clamps—spring clamps, bar clamps, or even heavy books—to hold your project together while it sets. Do not forget clean-up materials! Keep a supply of clean rags, paper towels, and the appropriate solvent (water for PVA, acetone for super glues) within arm’s reach. Rushing to find a wet rag while adhesive drips down the side of your freshly sanded wood is a stressful experience that is easily avoided by laying out all your essential tools beforehand.
Preparing Your Workspace
A well-prepared workspace is the unsung hero of successful glueing. Adhesives can be incredibly messy, and once they dry on your favorite workbench or dining room table, they are notoriously difficult to remove. Always start by protecting your surfaces. Lay down silicone mats, wax paper, or painter’s tape, as most adhesives will not stick permanently to these materials. Ensure you have adequate lighting so you can easily spot squeeze-out (the excess adhesive that pushes out of the joint when clamped). The environment itself plays a huge role; temperature and humidity can drastically alter drying and curing times. Most products perform best at room temperature (around 70°F or 21°C). If your garage is freezing cold, your adhesive might never cure properly, leaving you with a weak, gummy mess. Taking five minutes to set up your area, cover your surfaces, and check the room temperature will save you hours of cleanup and potential heartbreak later.
Safety Gear and Ventilation
Safety should never be an afterthought, especially when glueing with industrial or heavy-duty chemical products. Many advanced adhesives, such as epoxies, contact cements, and polyurethane-based products, release volatile organic compounds (VOCs) and fumes that can be harmful if inhaled in large quantities. Always work in a well-ventilated area. If you are working indoors, open windows and set up a fan to keep fresh air circulating. For particularly strong-smelling chemicals, wearing a properly rated respirator is highly recommended. In addition to respiratory protection, you must protect your skin and eyes. Cyanoacrylates can bond human skin together in seconds, which is a frightening and painful experience. Wearing disposable nitrile gloves keeps your hands clean and safe. Safety glasses are also a must to protect your eyes from accidental splashes or flying droplets when squeezing a stubborn tube. Taking these basic safety precautions ensures your DIY experience remains fun and injury-free.
Step-by-Step Guide to Perfect Glueing
Achieving a flawless bond requires a methodical approach. You cannot simply slap some adhesive on a surface and hope for the best. To get professional-quality results, you need to follow a structured, step-by-step process every single time. This process begins long before the adhesive touches the material and ends well after you have walked away from the workbench. By breaking the glueing process down into actionable steps—preparation, application, and setting—you eliminate the guesswork and drastically reduce the chances of failure. Whether you are building a custom piece of furniture, repairing a broken toy, or assembling a complex model, these universal steps apply. We will guide you through exactly what you need to do to ensure your bonds are tight, invisible, and structurally sound.
Surface Preparation for Maximum Adhesion
The absolute most critical step in glueing is surface preparation. If your surfaces are dirty, oily, or too smooth, the adhesive will bond to the dirt rather than the material itself, resulting in an immediate failure. Start by thoroughly cleaning both surfaces. Wipe away all dust, debris, and loose particles. If the material has oil or grease on it—which is common with metals and some plastics—use a solvent like rubbing alcohol or acetone to degrease it completely. Once the surface is completely clean and dry, you often need to increase its surface area by “roughing it up.” Lightly sanding smooth surfaces like plastic, metal, or painted wood with medium-grit sandpaper creates microscopic scratches. These tiny grooves give the adhesive something to physically grip onto, creating that essential mechanical lock we discussed earlier. Always remember to wipe away the sanding dust before you proceed to the next step!
Applying the Adhesive Correctly
How you apply the adhesive is just as important as how much you use. A common mistake in glueing is the “more is better” mentality. Excessive adhesive simply creates a messy squeeze-out that you have to clean up later, and in some cases, it can actually weaken the joint. For wood and large flat surfaces, you want to spread the adhesive in a thin, even layer across the entire contact area. You can use a dedicated brush, a plastic spreader, or even a scrap piece of cardboard. For smaller, precise repairs using super glues or epoxies, a single drop or a tiny dab applied with a toothpick is often sufficient. Consistency is key. Ensure complete coverage without creating puddles. When joining the pieces, press them together firmly and give them a slight wiggle or rub; this helps distribute the liquid evenly and forces out any trapped air bubbles that could compromise the integrity of the bond.
Clamping and Curing Times Explained
Once your pieces are joined, they must remain completely immobile while the adhesive sets. This is where clamping becomes essential. Clamps provide consistent, even pressure, forcing the materials tightly together and closing any microscopic gaps. When applying clamps, do not overtighten them, as this can squeeze all the adhesive out of the joint, leaving you with a “starved” and weak bond. Just apply enough pressure to bring the materials snugly together. Next, you must understand the difference between drying, setting, and curing times. Setting time is how long it takes for the item to hold its own weight without clamps. Curing time is how long it takes for the chemical processes to finish, reaching maximum strength. While a project might be safe to handle after an hour, full curing often takes 24 hours or more. Patience is the ultimate virtue here; rushing the curing process is the easiest way to ruin perfectly good glueing.
Advanced Glueing Techniques for Tough Materials
While bonding wood to wood or paper to paper is relatively straightforward, some materials are notoriously difficult to bond. These tough materials often require specialized products and advanced glueing techniques. Plastics, polymers, metals, and ceramics all have unique physical and chemical properties that actively resist standard adhesives. They might be completely non-porous, highly flexible, or chemically inert. To tackle these challenging projects, you need to step up your game, utilizing specialized primers, two-part chemical systems, and specific application methods. Let us look at a table to quickly reference which adhesive works best for these tough materials.
Material to Adhesive Reference Table:
|
Material Type |
Best Adhesive Type |
Preparation Needed |
|---|---|---|
|
Wood |
Polyvinyl Acetate (PVA) |
Clean, dry, light sanding if coated |
|
Metal |
Two-part Epoxy or Polyurethane |
Thorough degreasing, heavy scuffing |
|
Plastic (Hard) |
Cyanoacrylate or Plastic Weld |
Scuffing, sometimes requires a primer |
|
Ceramic/Glass |
Clear Epoxy or Silicone |
Clean with alcohol, ensure zero moisture |
|
Fabric/Leather |
Contact Cement or Fabric Adhesive |
Clean, dry, apply to both surfaces |
Working with Plastics and Polymers
Plastics are easily the most frustrating materials when it comes to glueing. Many everyday items are made from polyethylene or polypropylene, which have a slick, waxy surface that repels almost all liquids. Standard super glues and epoxies will simply peel off once dry. To successfully bond these challenging polymers, you often need a specialized plastic bonding system that includes a chemical primer.
The primer acts as an intermediary, slightly melting or altering the chemical structure of the plastic surface so the cyanoacrylate can bite into it. Another option is using a solvent-based plastic welder, which literally dissolves the top layer of the plastic; when you press the two pieces together, the plastic essentially melts into one continuous piece. Always check the recycling symbol on your plastic item to identify the specific type of polymer before purchasing your adhesive, as this will guide you toward the right solution.
Bonding Metals and Ceramics
Metals and ceramics present their own unique challenges because they are extremely dense and completely non-porous. Unlike wood, they cannot absorb liquids, which renders evaporation-based adhesives completely useless. For heavy-duty glueing of metals, two-part epoxies are the gold standard. Epoxies consist of a resin and a hardener that, when mixed together, create an incredibly strong, durable, and waterproof chemical bond. Preparation is vital here: metals must be fiercely degreased with strong solvents and roughened heavily with sandpaper or a wire brush.
Ceramics and glass are similar, but because they are brittle, you want an adhesive that dries relatively hard but has a tiny bit of flex to handle temperature changes. Clear epoxies or specialized glass adhesives work beautifully for fixing broken pottery or plates. When dealing with ceramics, fit the broken pieces together perfectly before applying anything, as the sharp edges need to lock together seamlessly for an invisible repair.
Troubleshooting Common Glueing Mistakes
Even the most experienced DIYers and crafters encounter problems. Sometimes, despite your best efforts, the bond fails, the joint is messy, or the materials simply fall apart. Troubleshooting these common glueing mistakes is part of the learning process. The key is not to get frustrated but to analyze what went wrong so you can correct it. Did you use the wrong product? Was the room too cold? Did you skip the cleaning phase? By diagnosing the root cause of the failure, you can clean up the mess and try again with better results. We will cover the most frequent issues people face and provide actionable solutions to get your project back on track.
What to Do When Glue Won’t Stick
The most common and frustrating issue is when the adhesive completely fails to adhere, leaving you with two separate pieces covered in a sticky mess. If you find yourself in a situation where the glueing process has failed, first, clean off all the old adhesive completely. Scrape, sand, or use a chemical solvent to get back to bare material. Next, review your process. The number one culprit for failure is poor surface preparation—usually hidden oils or dust. The second culprit is mismatched materials.
For instance, if you used standard wood adhesive on a smooth piece of acrylic, it will never work. Re-evaluate your material, consult an adhesive guide, and select the correct chemical formulation. Finally, check your environment and curing times. If you removed the clamps after 20 minutes when the bottle clearly states a 24-hour cure time, the bond simply did not have time to reach its required strength. For more insights on building and fixing things properly, check out the amazing resources at https://siliconvalleytime.co.uk/, which frequently covers tech and DIY innovations.
Frequently Asked Questions (FAQ)
Q: How long should I leave clamps on my project?
A: It depends heavily on the adhesive used. For standard wood PVA, leaving clamps on for at least 1 to 2 hours is recommended, though waiting 24 hours for a full cure before putting stress on the joint is best. Always read the back of your specific bottle for the manufacturer’s directions.
Q: Can I speed up the curing process?
A: In some cases, yes. Heat can accelerate the curing of epoxies and some wood adhesives, while specialized chemical accelerators (kicker sprays) are available for cyanoacrylates. However, forcing a fast cure can sometimes result in a weaker overall bond, so use these methods cautiously.
Q: What is the best way to clean up wet squeeze-out?
A: If you are glueing with water-based products, a slightly damp rag is perfect. For polyurethanes or epoxies, you will typically need a solvent like mineral spirits or acetone. Some woodworkers prefer to let the squeeze-out dry to a rubbery consistency and then carefully scrape it off with a chisel.
Q: Is there one adhesive that works on literally everything?
A: Unfortunately, no. While polyurethane adhesives (like the famous expanding formulas) are incredibly versatile and bond a wide variety of dissimilar materials, there is no single magical bottle that perfectly bonds all plastics, metals, woods, and fabrics under all conditions.
Conclusion
Mastering the art of glueing is a highly rewarding skill that empowers you to build, repair, and create with confidence. By understanding the underlying science of adhesion, selecting the right tools, and meticulously preparing your surfaces, you can ensure that your projects remain sturdy and intact for years to come.
Remember that patience is just as important as the chemicals you are using; giving your work the proper time to cure and set will always yield the best results. Whether you are tackling a minor household repair or a major woodworking project, applying these best practices will elevate the quality of your work. As you continue to explore the fascinating world of fixing and building, you might find it helpful to learn even more about the rich history and chemistry behind these miraculous sticky substances by reading the comprehensive entry on adhesives at https://en.wikipedia.org/wiki/Adhesive. Happy building!


